Two of our kids came for Christmas. I wanted to make a bunch of special meals. I have been thinking about a crepe cake for sometime. While searching out recipes I came across a red velvet crepe cake. Red velvet cakes are BIG here in Virginia, so I decided that would be a good dessert. Plus, red, hello, Christmas!
First I want to say that the texture takes getting used to. It is not the light fluffy texture of a moist cake. Even after a day of soaking up frosting the texture was rather dense and although it tasted fine, just remember this cake has a bunch of "crusts" even if they aren't crunchy. While I wouldn't make this cake for a taste test, when you cut into it the dramatic red layers with the white frosting makes a colorful and festive dessert for a holiday meal.
I used the Taste Of Home recipe for a starting point. The recipe made two crepe cakes. There were only going to be four of us and I didn't want to eat this cake for the whole holiday, meal after meal! So I played with it for a little bit and it came out pretty good. This only makes one cake and it made some extra crepes. This allowed me to taste the cake while making more crepes...a rather long process. It also allowed me to mess up a few crepes and still have plenty to make the cake! I am a fairly competent crepe maker and still botched 3 or 4 pieces, so give yourself the freedom to experiment and find the right amount of time to cook them so they will flip and also so they are not burnt on the bottom.
Red Velvet Crepe Cake
1 package red velvet cake mix
2 cups milk
3 eggs
2 egg yolks
3 Tablespoons melted butter
2 teaspoons vanilla extract
Frosting
If you are tired of cooking at this point, you can use store bought cream cheese frosting. Remember this is all about the drama and less about the food! And you will be tired by now. If you are ready to soldier on...
1 8 oz package cream cheese, softened
1/2 cup butter, softened
1/4 teaspoon salt
4 cups powdered sugar. Their full recipe called for 12, yes, 12 cups sugar! Mine was plenty and plenty sweet.
3 teaspoons vanilla extract
First get out the cream cheese and the butter if you are making your own frosting. It can come to room temperature while you are making crepes. Melt the 3 Tablespoons of butter and let cool slightly.

I didn't use my mixer because I wanted to make the frosting in it and I didn't want to wash it in between uses. Silly, right? Put the cake mix into a large bowl and add the eggs, egg yolks and vanilla.

Mix thoroughly and then add the melted, but not hot, butter. Stir (or mix in your mixer) for about 2 minutes. You don't want any lumps.

I have a crepe pan, but you can use small fry pan. I use a dribble of vegetable oil to keep the crepes from sticking. Pour a bit in a small bowl and dip a spoon into it between each crepes. Dribble it into the pan and swirl it all around. Just a dribble.
You may need to experiment on the amount to use for each crepe. I used a scant 1/3 cup. The 1/4 cup I tried was too thin and the full 1/3 too thick. You can mess up the first 3 or 4 and still have enough.
Pour the crepe batter into the center of the pan and then swirl it to cover the whole pan evenly.

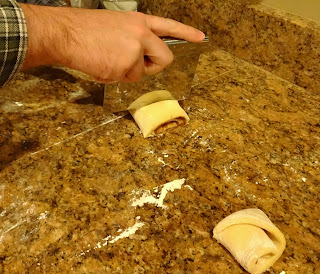
Cook until the top looks dry, about 2 minutes Like when you cook pancakes, it will have bubbles that form and burst. Gently loosen the sides of the crepe. Slide a narrow icing spatula, if you have one, or a regular spautla, under the crepe to the middle of the pan. Lift, and then gently lay the uncooked side down and flip the other side over. Cook for about 15 to 20 seconds more.

Line up a bunch of cooling racks and set the finished crepe on the rack. I was able to overlap them a wee bit and have room on my racks for all of them. If you will be assembling later, you can stack the cooled crepes with wax paper in between the layers. I just let them cool and then assembled them, saving a step. They cooled while I made the frosting. If you are using store bought, go sit down and have a cup of tea. That crepe making was a pain and you deserve it.

I used my Kitchen Aid mixer for the frosting. Place the softened cream cheese and the butter in the mixer and mix until fluffy. Add the salt and the sugar and mix some more. Add the vanilla and mix until smooth. Now you are ready to assemble. Don't loose heart. You are almost done.

The edges of the crepe will be thin and crunchy. This will make it uneven and put a lot of crumbs in the frosting. Take some kitchen shears and gently trim off the crunchy and uneven bits as you start to assemble the cake

.
Place one crepe on a cake plate. Plop a rounded Tablespoon of frosting in the middle of the crepe and gently spread it to almost the edge all around the crepe. Place another crepe on top and spread it with frosting. Don't worry. You will have enough and a bit left over. Try to keep the sides of the cake even as you layer. You will use about 15 to 20 layers. If you are having a hard time keeping them from sliding, chill your frosting for a bit. Or turn the A/C up. It is winter here and I didn't have any problems, but I can imagine a hot summer day and a tall pile of slippery layers. No fun.

When you are all done with layering, use a thin coating of frosting up the sides and on top. Chill the cake for about 10 minutes in the refrigerator and then finish the frosting. The thin layer is a crumb coat. After it chills, it will be easier to spread the rest of the frosting that you did NOT put in the refrigerator and it won't have a bunch of crumbs in it.

Tara made a stencil in the shape of a Christmas tree and we put colored sprinkles on top. It made the top layer a bit crunchy, but it was festive and fun. Feel free to use just the frosting. When cut into wedges, it is dramatic and beautiful all by itself.

If you want to make 2 cakes, don't just double the recipe. Go to the Taste Of Home recipe site and use their ingredients. Well, maybe not the 12 cups of sugar!!!


