Wednesday, March 30, 2016

Leek and Potato Gratin

Gratin is just a fancy (French) way to say put a brown crust on that dish.  Preferably with cheese! And leeks are like onions, only not quite as oniony.  So basically this is potatoes and onions with cheese and who wouldn't want some of that?

It makes an excellent side or vegetarian dish.  Next time I may try adding ham or sausage and make it a main dish for when I'm feeling like a carnivore. 

Leek and Potato Gratin

2 Tablespoons butter, plus a bit more for buttering the dish
5 cups peeled and thinly sliced yellow potatoes.  I used 4 large.
salt and pepper
2 large leeks
1 garlic clove , minced
1 teaspoon Italian Herbs
1 cup heavy cream
3/4 cup grated Asiago cheese


Heat the oven to 350°.  Butter a 2 quart baking dish. 


I just grab a wrapped stick of butter and unwrap enough to smear butter all over the bottom and sides of the dish.


Leeks are a bit tricky to prepare.  Cut off the tops and bottoms. 


Cut them in half lengthwise and hold under running water to wash out the dirt that WILL be between the layers.  Always. 


Then lay them cut side down and slice thinly. 


Layer the potatoes in the baking dish  Toss the potatoes with about 3/4 teaspoon salt and several grinds of fresh pepper.  Use your fingers to make sure all the slices are no longer stuck together and get their share of the S&P. 


Melt the butter in a large pan over medium heat.  Add the leeks, garlic, a bit more S&P and the Italian herbs.


Cook and stir for about 5-7 minutes.  The leeks should be starting to turn golden.  Add the cream and stir.  You want to get all the brown bits in the bottom of the pan mixed with the cream.  Simmer gently for about 5 minutes  Don't boil.


Pour the leek and cream mixture over the potatoes.  Stir a bit to mix gently and then spread the shredded cheese on top. 


Cover with foil and cook for 45 minutes.

Remove the foil and cook for 10 -15 minutes longer, The cheese should be bubbling and golden brown.  So plan for an hour to cook and 10 minutes to cool enough so that you don't burn the roof of your mouth.


I served this with a salad.   In this case, cole slaw.  Next time I will try adding some browned Italian sausage.  I have some waiting for me in the freezer and I have left over potatoes and cheese.

Saturday, March 26, 2016

Lemon Palmieri

I saw a video on making palmieri using puff pastry.  They are sometimes called Elephant Ears.  They are light, crispy cookies.  I was making some lemon gelato and thought they would look pretty served with it.  And who doesn't like a cookie with their gelato?  NO ONE, that's who!

I saved some lemon zest from the gelato and used it in these cookies.


Lemon Palmieri

1/2 package Pepperidge Farm Puff Pastry
1 cup sugar
pinch Kosher salt
zest of one lemon, about 1 Tablespoon

Lemon Glaze, optional

1/8 cup warmed lemon juice
left over sugar and zest


Mix the sugar with the lemon zest. 


Stir with a fork and set aside for the flavors to meld. 

Thaw the puff pastry according to the directions.  You may double the recipe and use the whole package, but I just wanted a few cookies.  I sealed the package with tape and put the other half back in the freezer.


Scatter 1/3 of the sugar mixture on the counter or cutting board. Use a fork to spread it out to the approximate shape of the puff pastry when you unfold it.  Place the puff pastry on the sugar and then scatter another 1/3 cup sugar mixture on top of the puff pastry.


Use a rolling pin to press the sugar into the puff pastry.  Do not try to roll the puff pastry larger. just firmly press the sugar mixture into both sides of the pastry.


There are two different ways to fold the pastry.  I chose to roll one side tightly towards the middle and then roll the other side towards the middle.  Wrap the roll tightly in plastic wrap and chill for 30 minutes.


Heat oven to 400°.  Place parchment paper or a Silpat on a baking sheet.


Remove the pastry from the plastic wrap and place on the cutting board.  Cut about a 1/2 inch slice of the rolled pastry.  Place both of the cut sides on the remaining sugar and then place on the prepared baking sheet.  Repeat for the whole pastry roll.


Bake for 20 to 25 minutes.  You will know they are done when the cookies turn a golden brown.  It is a very short time from golden brown to too brown and over done, so keep a close eye on the cookies after about 15 minutes.

You will have about 1/3 cup of the sugar lemon zest mix left.  You may wish to add a lemon glaze.    I heated about 1/8 of a cup of lemon juice in the microwave and added to the sugar.  Stir to dissolve.  Do this just before you take the palmieri out of the oven.


Right when you take them out, brush on the sugar lemon glaze.  The heat of the cookies will dry the glaze to a crispy, sugary lemony goodness!  Let the cookies cool a few minutes and then transfer to a cooling rack. You may have to gently peel them off whatever you used to cook them on.  After a few more minutes, lift and replace them on the rack to prevent sticking.


If you aren't using them right away, place the palmieri in a covered container and keep in a cool place.

I served these with my lemon gelato with white chocolate chips and a small sprig of mint.  But they were delicious all by themselves. 


Friday, March 25, 2016

Lemon Gelato with White Chocolate Chips

I had a heavy dinner planned and wanted to make a light dessert.  But I still wanted it to be special.  I wanted to make gelato, but I don't have a gelato maker.   I used a gelato recipe and then made it in my Kitchen Aid ice cream maker.   The lemon is really tart so I added some chopped white chocolate chips.

Lemon Gelato with White Chocolate Chips

1 cup whole milk
1 cup sugar
5 egg yolks
3 Tablespoon lemon zest, this took 3 lemons
3/4 cup lemon juice, this took 3 1/2 lemons, so buy 4
2 cups heavy whipping cream
1/2 cup chopped white chocolate chips


Start the recipe at least one day before you mean to serve it.  You have to chill the ice cream base and then you have to chill the finished product until it firms up.  Place the ice cream maker bowl in the freezer, if it isn't already there.  You will want it REALLY frozen.

Heat the milk over medium low heat.  Do not let it boil.  Stir in the sugar and continue to stir until it dissolves.  Remove from the heat.


Whisk the egg yolks. 


Zest the lemons.  I used 4 lemons for this recipe.  But I only needed 3 for their zest.  I zested them all and then saved the additional lemon zest for the cookies I was going to make for this dessert.  Just place any zest you don't need in a Ziploc bag and stick it in the refrigerator.

The milk should have cooled for a bit.  Take about 1/4 cup and drizzle it into the whisked eggs, while whisking.  Do this two more times.  You are trying to get the eggs heated up without making scrambled eggs.  Then slowly add the rest of the milk mixture to the eggs, still continuing to whisk.  Return the eggs and milk to the pan and place it back on the heat. 


Add the lemon zest and cook over low heat, stirring constantly, until the mixture thickens slightly and is thick enough to coat the back of a metal spoon. Do not boil.  If you do it will get that yucky milk skin and this does not make for good ice cream.


Remove from the heat and stir in the lemon juice and cream.  Place in a bowl with a lip for pouring.  Press plastic wrap on the surface of the custard and chill for several hours or over night.  I planned ahead for this, so I chilled it overnight.  If it isn't super cold, it won't freeze into ice cream well.


Before you remove the custard from the refrigerator, set up the ice cream maker.  Start it turning very slowly.  Then get out the custard, remove the plastic wrap and pour it carefully into the ice cream maker bowl, while the paddle is turning.  It will be really thick and creamy, so use a spatula to get it all in.  If you pour it in first, the ice cream (gelato!) may freeze in too thick of a layer for the paddle to turn.  It should fill a Kitchen Aid bowl about 2/3 full.  The paddle will add air to the mixture and it will rise to the top of the bowl.


While the ice cream maker was doing all the work for me, I chopped some white chocolate chips.  I looked for mini chips, like they have for chocolate chips, but there were none.  I didn't want big hunks of frozen chips in the ice cream.  That might be disconcerting to bite down on.


After the ice cream had risen to the top of the bowl, I added the white chocolate chips, making sure there were no large, unchopped ones.  This can be done by chopping some more, or by eating the big ones.  Your choice.  No points for guessing what I did!


Run the ice cream maker for a few more minutes to make sure the chips are all mixed in and then remove the base and use a rubber spatula to transfer the ice cream (gelato!) to a plastic freezer container. 


Chill for 2 to 4 hours, or until firm.


I served this in a champagne glass with a sprig of mint and a lemon palmier.  Those were easy and fast and I will tell you how soon. 

Wednesday, March 23, 2016

Cricut Box Cards

I made two more Cricut Box Cards.  Hopefully I am getting better.  They are short on information for putting them together. 


This is all you are given for instructions.  And it is very small.


My first few were not as good and these aren't perfect.


One thing I learned is not to use roller tape.  It doesn't stick as well as good glue. I wanted to use the tape because the glue can smear, but the tape can loosen over time.  I used paper clips and the tweezers from Cricut to hold the items in place until the glue dried.

There is a wee hole in the top of the tissue box.  I cut a corner from an actual CLEAN tissue and glued it in place.  Don't know if I'm supposed to, but it looked cute!


A Get Well wish for Rose.


I didn't realize I needed to string these little flags up until I tried to assemble the card.  I used embroidery floss.


A birthday wish for Tara!


I finally figured out how to fold them flat for mailing.  I enlarged them to fit in a regular invitation envelope that I buy from Staples.  They cost the same as a regular first class envelope.

Tuesday, March 22, 2016

Mozzarella Stuffed Garlic Knots

I had a dinner party scheduled.  I knew I was going to make some lasagna, so I wanted something to go with that.  I decided to try garlic knots.  You know, those knotted bits of fluffy bread slathered with garlic and butter?  Yum!  I wanted to go one better and try to stuff them with some mozzarella.  I made them once before the dinner to make sure they would turn out.  Once I made them with only butter and no olive oil.  Once I made them with fresh parsley.  I tried them with a small dish of pizza sauce and then with the lasagna.  They were good every time.  Really good.  Every time.

Even better, they were pretty easy.


Mozzarella Stuffed Garlic Knots

1 canister of Pillsbury French Bread or Bread Sticks
3-4 gloves garlic, minced
4 Tablespoons butter
4 Tablespoon olive oil
1 teaspoon each of fresh parsley and basil, minced or 1 teaspoon Italian herbs
fresh mozzarella

Pizza sauce, optional.


Heat the oven to 375°. I used a cake pan once and a baking sheet with a Silpat another time.  Both worked well.  Get out the pan you will use.


Melt the butter with the garlic in the microwave, about 30 seconds.  I like to put a paper towel over the bowl as butter tends to spit before it is fully melted.  I hate cleaning the microwave. 

Add the herbs you will use.  Choose any mixture of Italian herbs you like, parsley, basil, cilantro or the dried Italian herbs that I used.  Because I had them.

Cut the Mozzarella in 1 inch cubes.  Open the canister and if you are using the French Bread, cut it into 8 equal pieces. ( The Pillsbury bread sticks were unavailable here, but they are already long and you may need two pinched together to fully cover the cheese lumps.)


Using a rolling pin, roll one piece about 2 inches wide and 4 inches long.  Place a cube of cheese in the center and fold one half over the cheese, lengthwise.  Then fold the other side over that and seal by pinching with your fingers.  It will look like a snake the has just consumed a large meal.


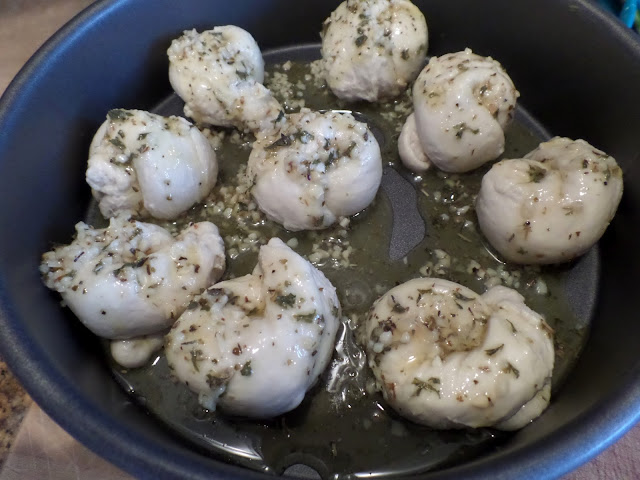
Pinch gently on either side of the cheese lump and lightly stretch the long ends as far as they will easily go.  You don't want to tear them.  Fold the bread around a finger and make a knot.  You want to fully pull the bread tail through the loop in the knot.  If it isn't, the knot may unravel.  It will still be tasty, but it will be a garlic crescent.  Place the finished knot on the baking pan and repeat for all the other pieces of bread.


Pour or brush about half of the butter mixture over the bread knots.


Bake for about 15 to 20 minutes or until they are golden brown on top.  Some of the mozzarella make leak out or be absorbed in the bread. 

Brush the remaining butter and garlic mixture over the garlic knots when you take them out of the oven.  Then remove to a wire rack to cool slightly before serving.

Next time I may try a regular ball of mozzarella and see if they last longer in the oven than the fresh cheese.  Just know that any combination of herbs and cheese will make a fabulous side dish.
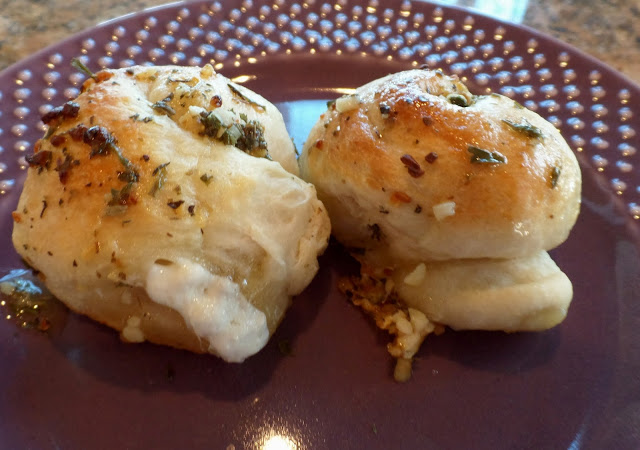
 

I served them with a small dish of pizza sauce when I fixed them before the lasagna.  Quite good.  Then I served them with the lasagna.  Also delicious.  I'm sure no one noticed I mopped up the tomato sauce with a corner of my garlic knot.  Cause my guests are way more polite than I. 

Monday, March 21, 2016

Off The Grid


I just finished Off the Grid, the latest mystery from C J Box.  It is a Joe Pickett novel.  Joe Pickett is a Game and Fish Warden from Wyoming. He is a great Game warden and a terrible shot.  So his favorite weapon is a shotgun.

This book involves a bear attack and the tracking of the rogue bear, a terrorist plot and falconry, all in one great book.

Most of the Joe Pickett books feature Nate Romanowski, a former Special Forces operative that now lives off the grid and flies his falcons.  He has gotten Joe into trouble with his less than stellar view of some of the things the government does.  He has also saved Joe and his family from armed people with evil intent.

The main thrust of this book is a small group of idealists who are upset at NSA for the collection of Metadata, all phone, email and texting data, for possible future use.  He devises a way to fry the computers with an electromagnetic pulse and destroy all the collected data.   A Middle Eastern terrorist cell wants to steal the mobile machines made by this group and destroy airplanes, hospitals and even the electric grid all across the United States. 

It is up to Nate and Joe to stop them. In the middle of a Wyoming desert, with no cell service to call for help.  On top of that, Joe's daughter, Sheridan has been recruited by her college roommate to spend this particular weekend to help out the group.  So Joe and Nate have to rescue a bunch of college students and save the world.  No problem.  Game wardens are trained for this sort of thing!

All of Box's books are exciting and fresh.  His characters are compelling.  When I worked in a library I would sometimes get a man that hadn't really read a lot of fiction and he wanted a recommendation.  If he enjoyed the outside and nature, I would recommend C J Box and they would always come back and get the rest of his books.  A fabulous writer.