Wednesday, December 28, 2016

Sewing Pottery II


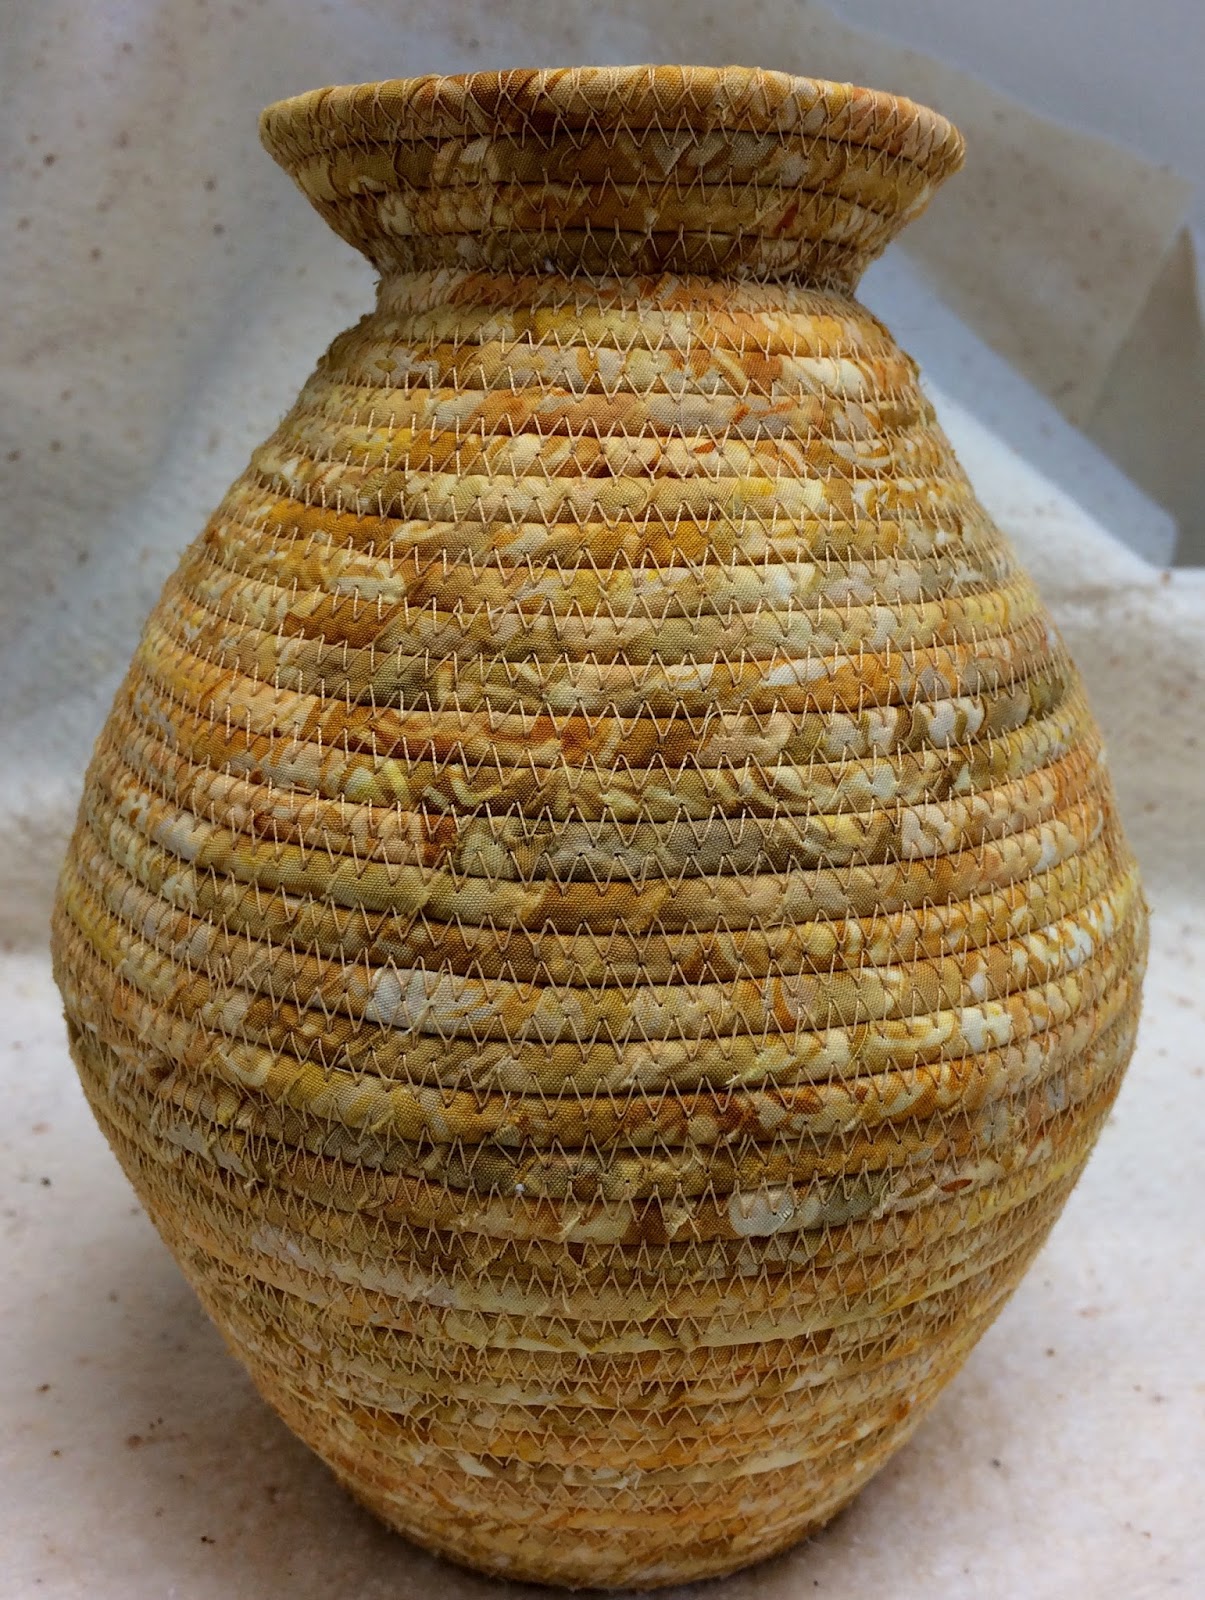
I have made a second pot using strips of fabric wrapped around clothesline.  I learned this technique in the book, Sewing Pottery by Machine.  I have discovered two things.

1.  These are not terribly difficult, but they are terribly time consuming. 

2.  Because of 1., I wont be making any more of these anytime soon.


The basket I chose to make has three pieces.


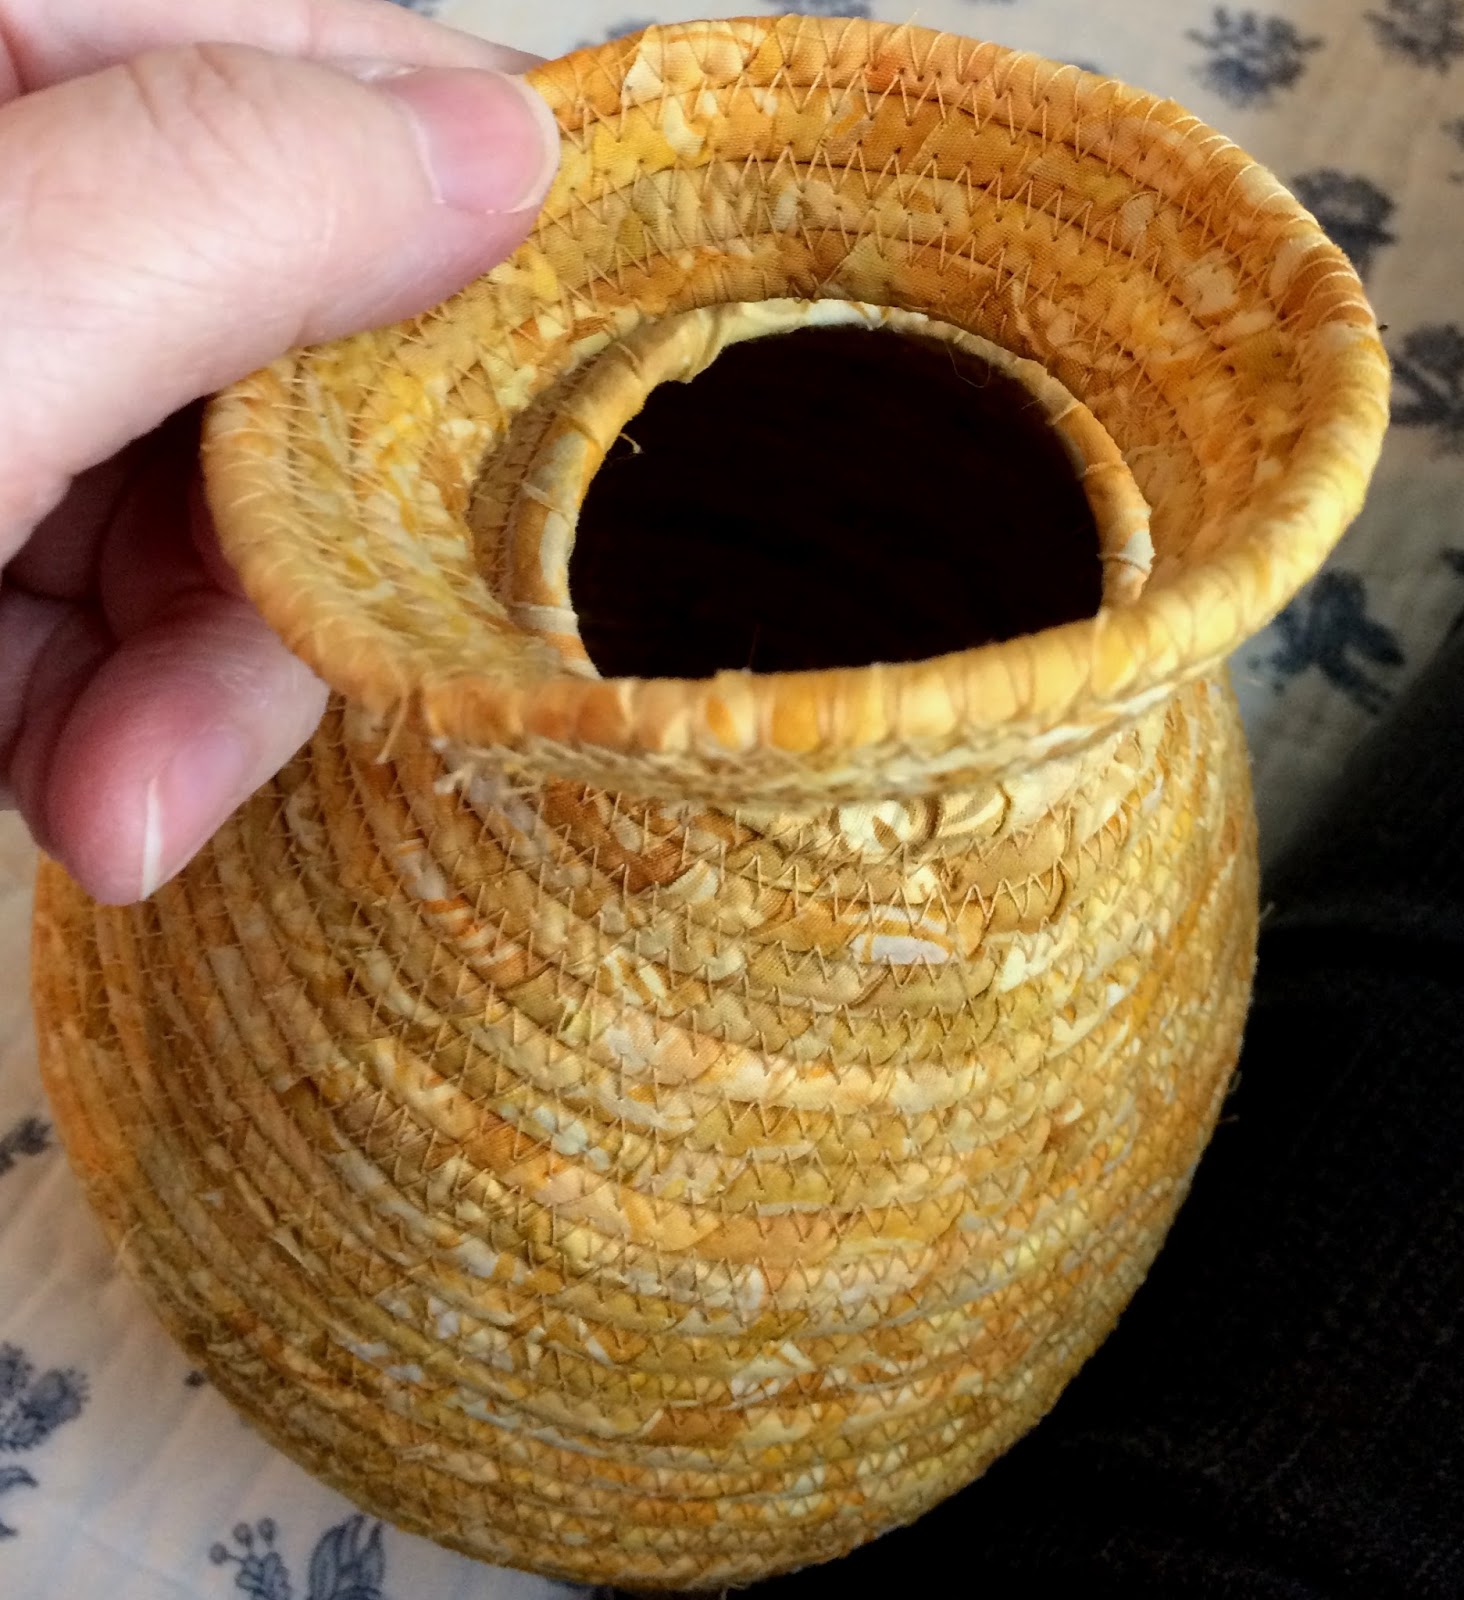
The way you make these baskets with a hole in the top is to use a flat disc the size of the hole you need.  In this case it is a 2 inch disc, the one in blue.

There is a bit of fiddling to make sure the opening of the bottom piece matches exactly to the opening of the middle piece.

Then you use a seam ripper to remove the flat disc.  I needed two flat discs for this project, so after I removed the one from the middle piece, I used it for the top piece.


That is the quickest part and still took parts of two days.


Then the time consuming, finger poking began.  Basically it involves sticking your thumb and forefinger inside the hole on the top while holding a threaded needle.  A very long and sharp needle.  I had to poke it through many times to find the exact spot to stitch.  It needed to look as much like the machine stitching on the rest of the basket as I could manage.  Then I poked it back through the project, a much easier thing, because now I could see what I was doing, right?

Well, the stitch placement was easier, but the reaching in to get the needle provoked many words followed by exclamation points.  We'll stick with ouch!, shall we?


The top piece was sewn on much quicker, but still took close to an hour. 


At some future date I may add some embellishments around this pot, but that will have to wait.  I have spent DAYS on these sewn pots and while I like them, I need to get back to making fabric baskets to sell. 


I already have a commission to make a couple for my cousin.  She wants them large enough to hold a ball of yarn and with a loop to pull the yarn through so it won't get tangled.  That seems like a fun and worthy project! 

I still need to finish my Etsy site and start posting baskets, but I just want to make one of the baskets for Saja and see how that goes.  I'll keep you posted. 

Saturday, December 17, 2016

Fabric Pots

I have had a lot of fun making fabric baskets.  I am still going to make them.  In fact, I am planning to sell them on Etsy.  But in the meantime, I found this book on sewing fabric POTTERY.  That sounded fascinating.

Does my blue "pottery" look like the one on the right?  It's what I was going for.
 

Sewing Pottery by Machine by Barbara Warholic demonstrates how to sew pots using the same techniques as sewing fabric baskets. 


First you sew the base of the pottery.  Next you sew a flat circle of fabric as a plug and use that to hold the hole in the top of the pot. 


Sew the top of the pot to the plug and then continue sewing a fabric basket until the two openings are the same dimension. 


A seam ripper takes out the fabric plug and you set it aside for the next project that needs the same size hole in the top.


Lining them up is a big tricky, but the directions tell you to leave a small tail and that is used to cover where the two halves come together. 


They most difficult part is then reaching your big hand in the little hole and hand sewing a zigzag stitch to match the machine zigzag stitch throughout your project.  This took many hours and I hope I get better at it soon.

I must say it is also difficult to make the two halves exactly the same size and I had to remove the top half several times to add or subtract stitches. 


The finished fabric pot is not perfect, but it is my first one.  I am going to try a different pottery project from the book and see how that one goes.  It has a larger opening making it easier to do the hand sewing, but it also has more pieces, so it is more challenging.

This is fun!!

Monday, December 12, 2016

Parts Tractor Part II


The parts tractor is slowly moving from a big part in the drive to small parts in the garage.


Lee is removing things and then cataloging and shelving them.  This is a laborious process, but he seems to like it. He is also looking up the parts numbers and making sure they are marked on the individual part.  He has a list on the computer.  Who is the librarian (library assistant) here??


He put one part on craigslist as a test to see if there are clamoring hoards of people looking for Daedong tractor parts.  So far, they are controlling themselves.  Or maybe a new old tractor part doesn't make for an exciting Christmas gift.


Then he used our working tractor to remove parts from the donor tractor.  There is, perhaps, a metaphor here, but I can't think of one. 


But there is something strange about harvesting your own organs for a possible future transplant that sounds like the beginning of a horror movie.  Or an episode of a medical drama, after they have jumped the shark.


The process is almost finished.  Then he will start looking for another project.  On the bright side, it is getting darn cold (21° Fahrenheit last week) so that may push him inside, where car and tractor parts aren't allowed.


Monday, December 5, 2016

Parts Tractor

Have you heard of a parts car?  That is when someone buys a not very good car with some good parts to use to fix up their pretty good car.  Well, Lee just bought a parts tractor.

We bought a tractor when we first moved here.  It was necessary to help clear the land for use, move boulders, sand, gravel and other tractory things.  We have lots of steep hills, so we needed one with a pretty big engine and 4 wheel drive.  We knew nothing about tractors, except the pretty green ones (John Deere) are very expensive.  We found a guy about 1 1/2 hours away that had a wide variety of used tractors and bought one from him. 

This was a Daedong tractor from Korea.  They don't make them anymore, but he assured us he could get parts, usually from Kioti, which makes a similar tractor.  That worked okay for a few years, even with getting parts from as far away as Korea and New Zealand.

Then it quit working and a part we needed was unavailable.  Now, we use the tractor many times during the year, but not enough to justify buying a super pricey one.  Probably.  Then Lee found a guy that had an old Daedong tractor, just like ours, that he had been using for parts to fix his Daedong tractor.  Then he sold the good one and had the leftover tractor sitting in his field.  So Lee bought it.


Notice on the fender that this is the DELUXE version of this tractor.  Pretty impressive, right!
 
Is this a smart purchase?  Who knows.  At the present, Lee is taking all the parts off and storing them.  The farmer he bought it from had to lift the tractor onto Lee's trailer with a fork lift, because he had taken the wheels off to use them elsewhere. We don't have a fork lift.  So we can't use the trailer or put it back into the barn until we get the tractor off.  His plan it to remove all the parts and label them.  Then we will use our engine hoist or the front loader on the currently working tractor to take the last heavy bits and put them somewhere.  Somewhere.

You can see the tractor we use off to the right in the background.  Maybe he should just fix it up and get a John Deere!  But where is the fun in that?
 
Lee intends to keep a few parts to repair that which he figures will break on our working tractor.  The rest of the parts he will put on EBay or craigslist and sell.  Those of you city dwellers don't realize that a farmer can take an old engine and use it to power all sorts of equipment that he has put together.  They are perhaps the last of the brilliant, self-taught mechanical engineers!  So, he figures someone will buy it.  What he doesn't sell or save for future use, he will sell for scrap. 

Lee thinks he can break even or make money on the deal.  I have my doubts.  But he is enjoying himself with this new project, so it's all good.

Friday, December 2, 2016

Bean with Bacon Soup

Do you remember making Campbell's Bean with Bacon soup?  That was always a rainy day favorite.  I still buy it occasionally to keep on hand for those days I don't feel like cooking. 

But that was before I started seeing other people's version of it on the internet.  I thought, I can do that.  So I did.

Bean with Bacon soup

4 cups chicken broth
2 cans Northern White Beans, rinsed and drained
8 or so slices of thick cut bacon
1 cup diced carrots
1 cup diced celery
1 cup diced onion
2 Tablespoons tomato paste
2 teaspoons minced garlic
pepper to taste
Don't add salt.  The bacon is plenty salty.


Place the broth and the drained beans in a large stock pot. 


Heat to a low boil.


Brown the bacon in a large fry pan.  It took me two batches.  Remove the pieces when brown on both sides and drain on paper towels.

Add 2/3 of the bacon bits to the soup pot.


Pour out most of the bacon grease, leaving a Tablespoon or so for cooking the vegetables.  Place the vegetables in the fry pan and cook until softened and the onions are translucent.  Add the tomato sauce. Even though the tomato paste comes in a small can, I rarely use the whole thing  I freeze the remainder in  Ziploc bag in lumps of about 2 Tablespoons.


Cook the veggies until the tomato paste is fully incorporated.  Then add them to the soup.


Cook for about 5 minutes more.  You want all the flavors to blend!


Serve with some of the reserved bacon pieces for a garnish.

I'm not going to say you will never buy a can of this soup again.  That is a nice and easy choice.  But this soup is more flavorful and has REAL bacon pieces, and big ones!  It is also pretty quick.  Most of the time is spent cutting veggies and cooking the bacon, and that goes pretty fast.

I could soak the beans overnight and make my own chicken broth.  But I won't.  I like to cook, but I am not a fanatic about it!