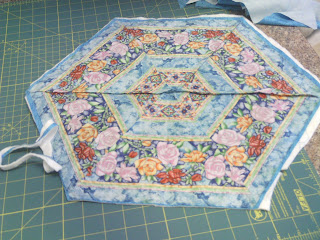
I took it back to the Quilt Shop and said "What did I do wrong and how do I fix it?" Or words to that effect. Caroline very kindly explained to me that as long as the lines matched the center was an iffy thing....or words to that effect. So I was let go to work blindly in the darkness..or in the privacy of my craft room.

I cut 6 triangles with the 60 degree ruler. This actually means you have to cut 12 triangles because you have to flip the triangle over so that there is no waste. This means each place mat will be different, because you will have different areas of the stripes at least I did for my particular fabric. But that is OK because I like them both.

I lined up the stripes and sewed them together until I had 2 sets of three. This will be half of your placemat top. I then cut a straight line across the centers so that they would line up better.
Sew the two halves together and press. Make sure the stripes all line up. I didn't have to pick out thread and resew very much. Maybe I have gotten better at this sewing thing...or, worse case scenario, I have gotten less picky.

I had a lot of left over batting from the quilts I have made...all two of them. I did not want to buy new batting for this project. I lined up the scrap pieces with the straight edges together. I placed the top I had finished on the two pieces of batting and cut with an extra inch margin...just in case. I don't KNOW in case of what? I just DID.

Butt the edges of the batting together right under the presser foot, lined up so the seam is centered. Then zigzag with fairly short stitches until the two pieces are joined together. Voila! ( This is about 20 percent of the French I remember from high school.) One piece of batting for your place mat, at no additional cost. My favorite kind of project.
When I finish quilting I hope everything will stay nicely in place and I am not going to worry about it. Not ever. It will be fine. Keep going!

Next I measured the backing fabric and cut it in strips. I placed the tops face down on the backing fabric and cut around the edges with my large clear ruler. I also left about 1/4 inch, just in case...
Next make a sandwich. The batting, then the backing face up and the top face down. Smooth and pin. Sew 1/4 inch in from the edge of the top piece. You will want to leave about 8 inches unsewn to turn the piece right side out. I put two pins where I want to stop and start. This reminds me not to sew the whole thing!
I just did a quick quilting of "stitch in the ditch". Gently pull out at each seam on each triangle and sew in the seam. I also sewed around one of the stripes about halfway up. I have to make a lot more so I don't know if I will do more quilting. I am thinking of adding some 1/4 inch in from the edges all around.

I still don't like the wonky centers. Don't know what to do about that. If I had one of those fancy machines I might add some embroidery to hide it. Still thinking...

I think you need one of those fancy machines too.
ReplyDelete