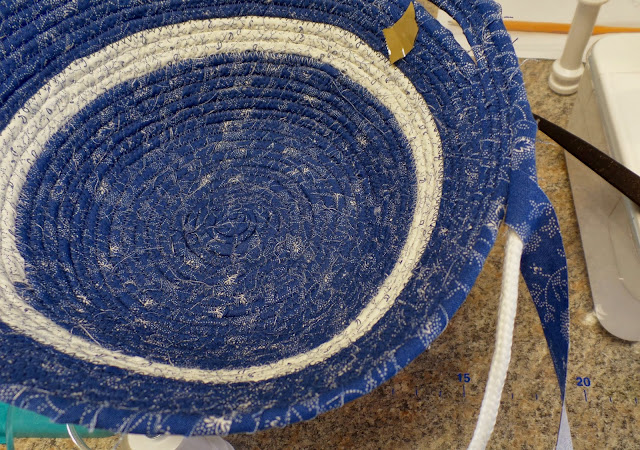
I bought some clothesline from Walmart. Then I cut some strips from fabric left over from other projects.

The book said to cut strips 1/2 to 3/4 inches wide. I found the smaller size worked better.
Put some glue on the wrong side of the end of a fabric strip and glue it around the end of the rope. Place the rope in the middle of the strip so that you can fold the fabric over and cover the raw end. I also cut the hard melted bit at the end, so use lots of glue to hold everything together. Then wrap, on a diagonal, around the rope for about 5 inches and glue it again. Keep wrapping for about 2 feet, gluing every 5 inches. Make sure you always wrap in one direction. Changing directions causes lumps.

Sew straight down the middle of the first five inches of wrapped clothesline. It helps to have something to hold or push the covered clothesline through the machine. I used a large seam ripper. Don't sew your fingers.

Now you can start to sew. You will need a zigzag foot and thread to match or contrast with the fabric. Make a coil about 1 1/2 inches in diameter and using a straight stitch, sew an X to hold it in place. Use the bit of tail to fill the center and fold it as you coil it so the wrong side does not show. Don't allow any gaps or holes. Then sew a zigzag stitch all around the circle. Keep the clothesline end on the right hand side of the project.
I found it hard to go all around the center. I did as much as I could and then sewed the rest when I was all done with the basket and didn't have to deal with the huge hunk of clothesline going around in circles.

Then just wrap and sew until you have a base you want. I chose to do about 4 inches. Mark this spot with a piece of tape.

Keep stitching, but hold the left side of the flat bowl base up about 1 finger width off the surface of the base of the sewing machine. Sew one complete circle and when you get back to the tape, do another circle holding the left side up four fingers worth.
As you sew, you will need to grab another strip of fabric as you will have run out. Glue the end and wrap it around the rope. Then pin in place. Glue the beginning of the next strip and wrap it to cover the cut end of the last strip. Re-pin to hold the two strips in place and keep going. When you get to the pin, remove it and sew.

All this gluing of fabric with a raw edge will get glue and bits of fabric on your fingers and fabric on the glue stick. Stop every once in a while and wash your hands and wipe the top of the glue stick.

When you finish the second circle, hold the base up against the left side of the machine as you sew. You have the beginnings of a basket.

Make it as high as you like and then cut the clothesline about 1 1/4 inches longer than you want.

Cut that section of clothesline lengthwise on a diagonal so that it gets narrower as it reaches the end. I had a lot of fluff from the weave around the cord, but just discard that. Glue enough fabric to wrap that section and then another 1/2 inch.

Cut the fabric and wrap it tightly around the cord and tuck in the end of the fabric. Sew it with the zigzag stitch.

Go once around the top of the basket and you are done.

I chose to put a stripe on mine, by changing colors at the tape and then stopping when I reached the tape, after a few times around. And I played around with handles. Next time I may do all one fabric or scraps that go together. Or I may go crazy and mix and match it all up. The book has a lot of ideas and I also want to try a purse.

I just went to Walmart and bought 4 more rolls of clothesline!!! I have a lot of scraps to use up.

love it, and seems super simple and lots, and lots of great ideas and things I could make when I get my sewing machine back.
ReplyDeleteReminds me of the braided rugs my grandmother made.
ReplyDeleteIt's beautiful. You really could go crazy making these in whatever colors you have on hand. Good job!
ReplyDeletepopped back to say, I can't get that book on Amazon.ca.......will have to look for it elsewhere.
ReplyDeleteWOW!! That's looks like lots of work. I'm not much of a sewer, but wondered, how did you get something soooo thick through your machine? I had no idea those little bowls had actual rope in them. Also didn't know what they were called. Happened here from a mutual blogging friends blog.
ReplyDeleteSandy's Space