
Peppermint Ice Cream
2 1/2 cups heavy whipping cream
1 1/2 cups half and half
6 egg yolks-save the whites for another use! Like meringues, for instance.
3/4 cup of sugar
1/4 teaspoon salt
about 2 teaspoons peppermint extract
1/2 cup chopped peppermint candies
5 drops red food color, optional
Freeze the Kitchen Aid ice cream base overnight.

Place the milks, sugar and salt in a large saucepan.

Heat on medium, stirring to dissolve the sugar. Don't let it boil. Set it aside to cool.

Whip the egg yolks. (I saved the whites, but you can toss them if you don't have a plan for them.) Then you need to temper them so you can cook them and not end up with scrambled egg ice cream. To do this, slowly drizzle a small amount (about 1/4 cup) of the partly cooled milk mixture into the whipped eggs, while stirring vigorously. Then do it again. And again.

Now pick up the pan and continue to drizzle and whip until you have incorporated the whole shebang into the eggs. Then return the eggs and milk to the pan and place it over medium low heat.
Cook for about 5 more minutes, stirring constantly. Don't let it boil. The mixture will thicken slightly and coat the back of the spoon.

Strain the mixture through a wire strainer and chill for at least 4 hours , or overnight.
When you get the ice cream base out of the refrigerator, it will be thick and sort of custardy. Because it IS custard! Add the peppermint extract. I put in 1 teaspoon and tasted it. Then I added a 1/2 teaspoon at a time, tasting after each addition. I used 2 teaspoons. You may need more or less depending on the flavoring you use and your own taste buds.

I added a bit of food coloring to make it pink, but that is up to you.
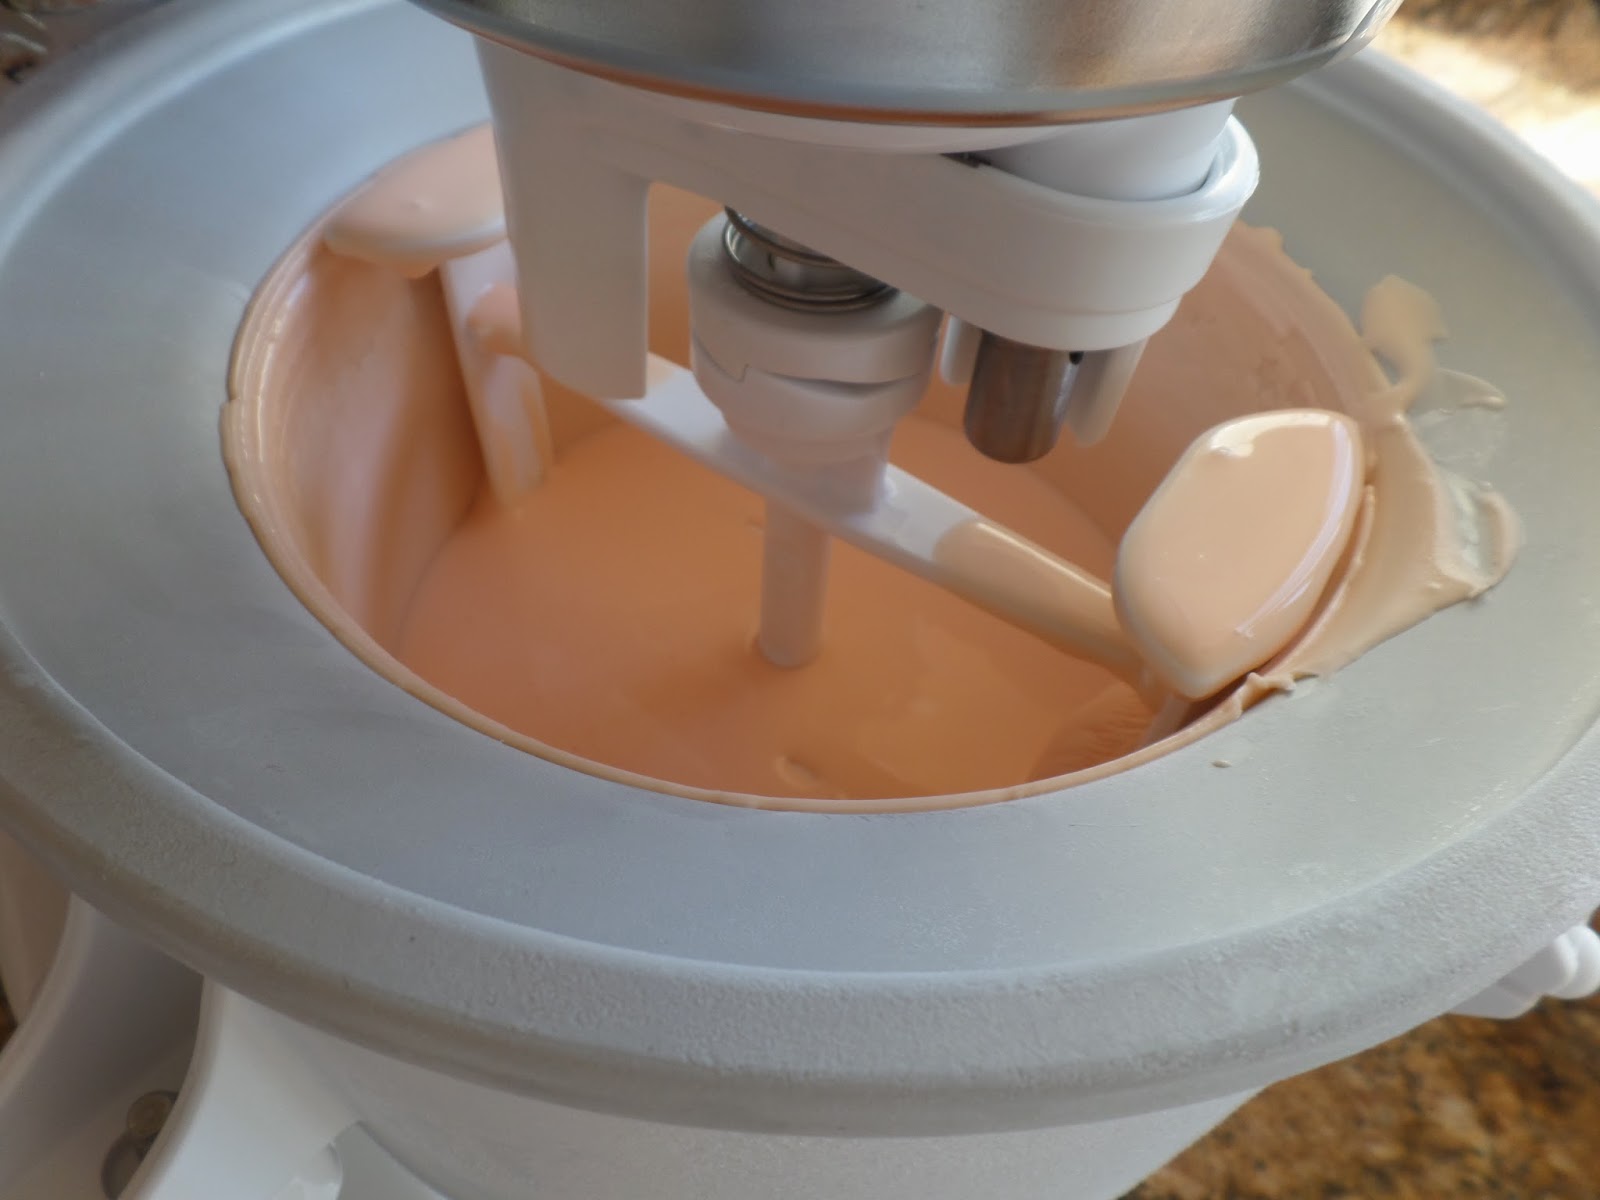
Assemble the Kitchen Aid mixer with the ice cream attachment and start it on stir. While it is stirring, add the ice cream base. It will take about 30 minutes. This is a good time to crush the candies.

My method was to unwrap and place the candies in a Ziploc bag. Squeeze out the air and seal. The stick that into ANOTHER Ziploc bag, squeeze and seal. Place on a cutting board and whack away. I used a muddler and a rolling pin and STILL I had a bunch that didn't smash sufficiently. If you care for your teeth, pick out the big chunks.

When the ice cream has risen to the top of the mixer and it appears to be struggling to mix, turn it off and remove the ice cream mixer bowl. Scrape off the paddle and look around for a child to lick it clean.
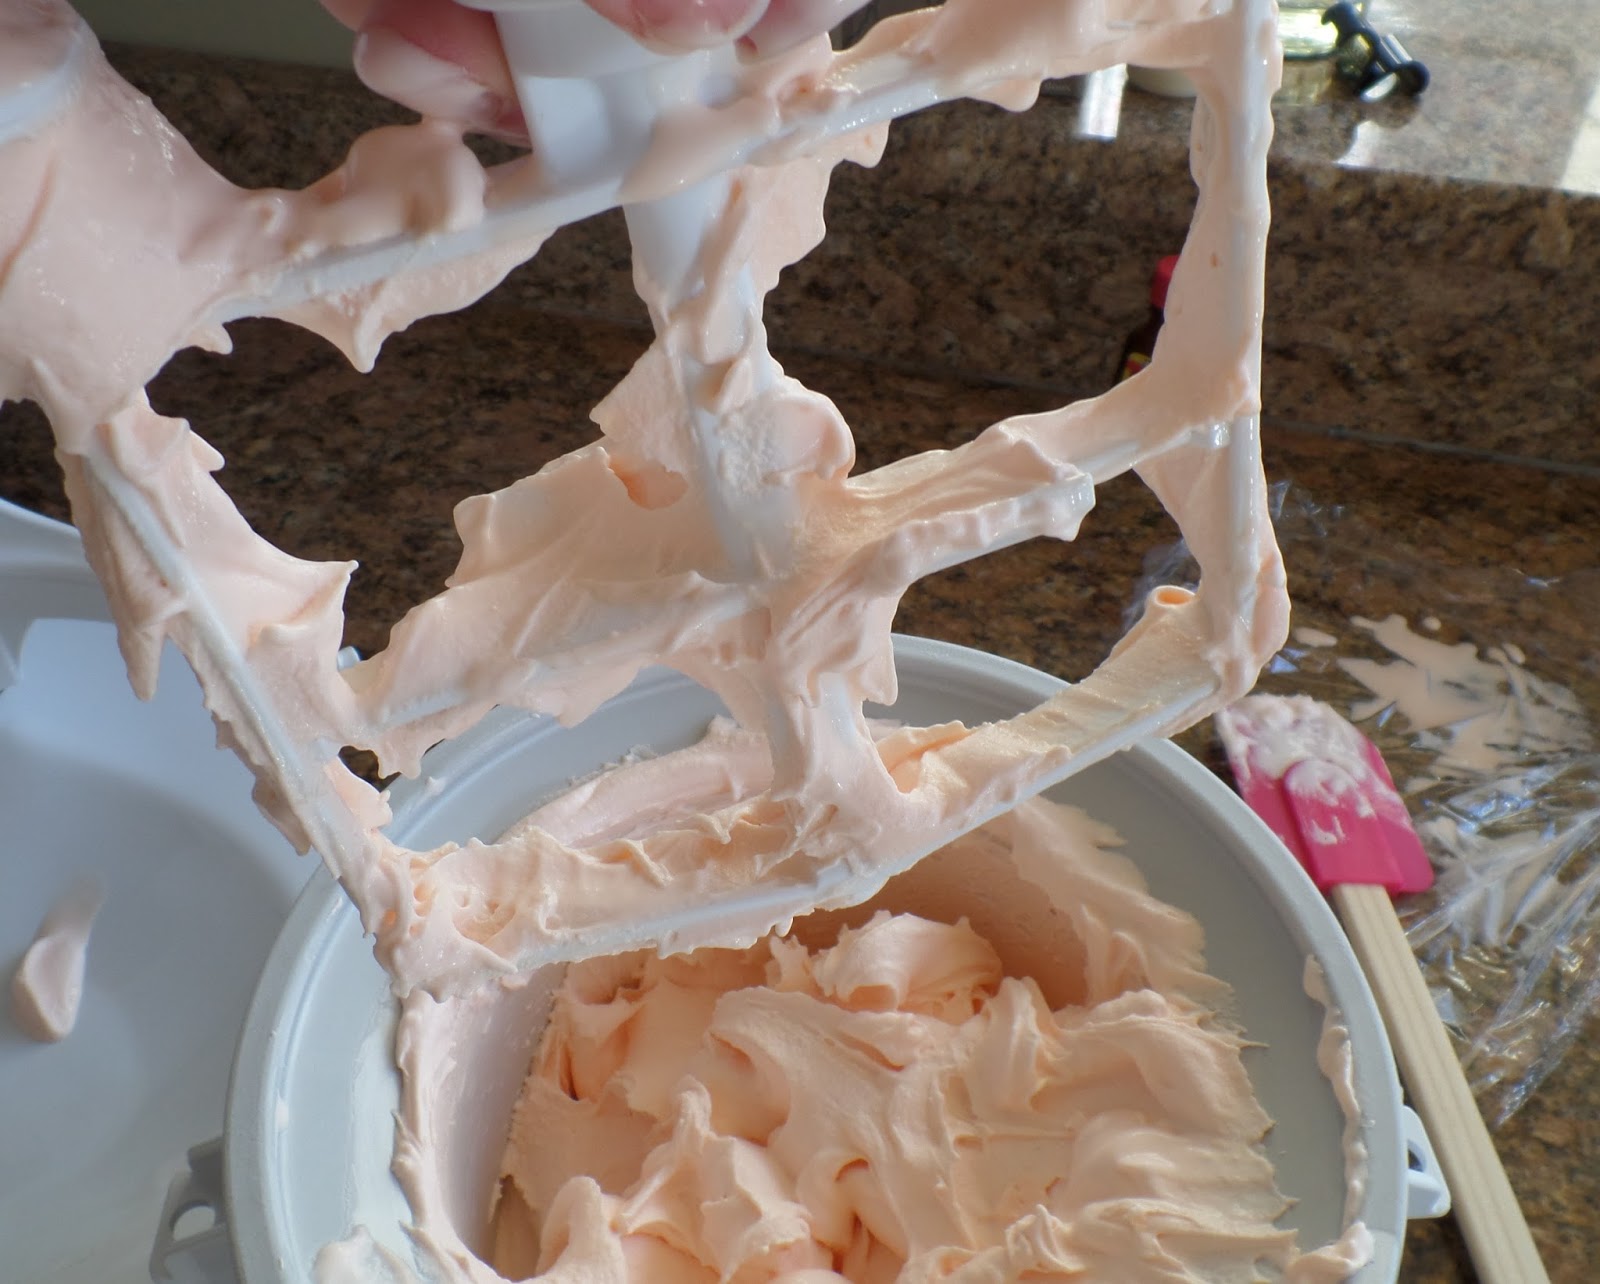
Scrape about half of the soft ice cream into a food saver container with a lid and fold in about 1/4 cup of the crushed candies. Scrape the last of the ice cream into the container and fold in the rest of the crushed candies.

The ice cream can be served now, but it will be very soft.

Freeze it for a few hours and it will become ice cream consistency.

I chose to serve it with hot fudge drizzled over it. You may not know that hot fudge drizzled over just about ANYTHING is a good idea. But trust me on this! I also added a few sprinkles of even more crushed peppermint candies. Because it is almost Christmas and that means peppermint.

I wonder how it would taste in coffee? Peppermint latte, anyone?
This looks so good! Thank you for the recipe!!!!!
ReplyDeletePeppermint is good all ways and hot fudge is better with anything that's a fact (isn't it?). I am sure that your guests enjoyed tasting this treat even more than I enjoyed reading it (sigh).
ReplyDelete