Showing posts with label quilt making. Show all posts

Monday, August 3, 2015

Quilt Progress

I've been working on a baby quilt.  This one has rubber duckies all over it in different fabrics.  Once again I am going solo, without any expert help, so there are times I have to cut new squares or waste material in other ways.  I always try to buy extra so I don't have to match fabrics from one store at another.  Now that I make scrap fabric baskets, I don't mind having the left over bits and pieces of fabrics.


The rubber duckies are appliques, so I bought some clear plastic to cut out templates.  The only kind they had was with a grid, but that made it easier to see when then templates were on the counter.  They were pretty easy to cut.


I ironed some fusible interfacing on to the fabric.  On the wrong side.  You know, after you do it on the RIGHT side and say a bad word. 


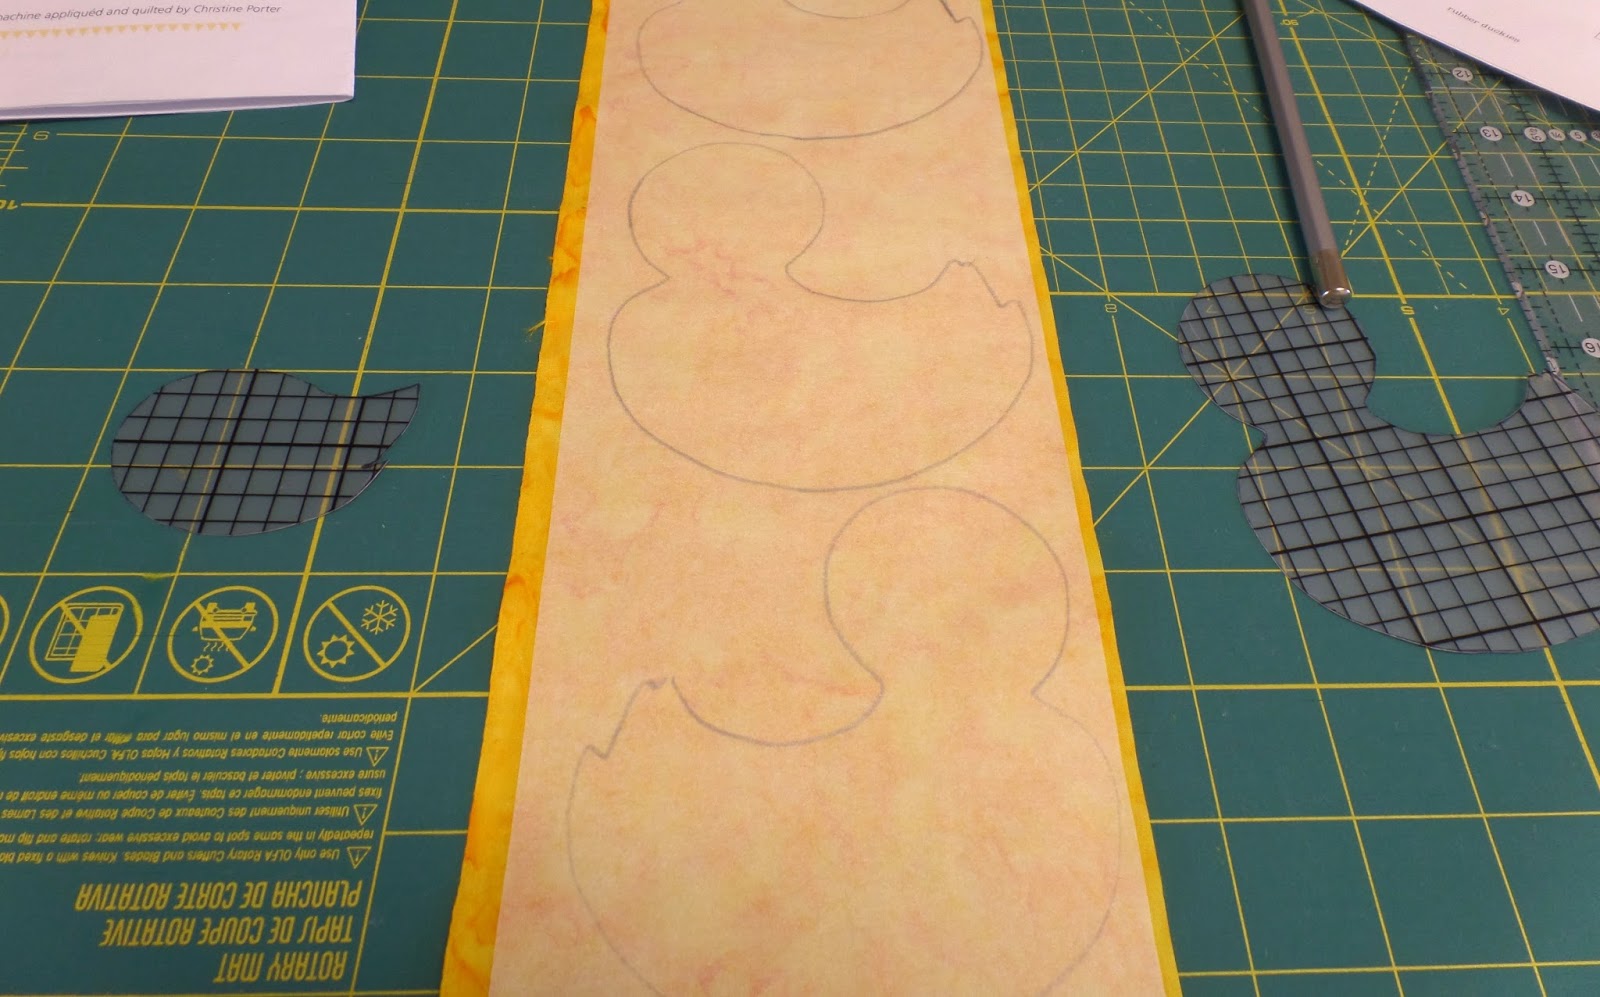
Then I traced the duck parts on the paper and cut them out.


The small blue squares are placed in the corner of the light green and yellow green larger squares and then sew on the diagonal.


Cut off the excess and press to one side.


You have to peel the paper backing off the cut outs.  Place the glue side down on the squares and iron them in place to glue them down.  I ironed one duck, one wing, one beak and one eye on each square.  Try to make each one a different combination.  One set of duck parts is backwards and one of the duck tails is different.  So maybe the baby can play., "One of these things is not like the other..."  What do you mean you never watched Sesame Street? 


The pattern called for hand stitching the edges of the ducks parts with a blanket stitch.  I tried it and didn't like the way it looked. 


I also worried about little finger picking at the edges and lots of machine washing and decided that machine stitching was the way to go.  In some places I had to do one stitch, turn the fabric and do one more.  For the whole thing.  But it was still faster and better than the hand stitching and I like it. 


I need to do 18 squares for this quilt.


Tuesday, February 3, 2015

More Wedding Ring

I am making slow but sure progress on my quilt.  I have cut all the pieces I need for the rings.   I cut a few extra wedges, in case I ruin a few or don't like the last of the colors.  I cut a bunch of the quilt top background squares and a few of the interfacing arcs for attaching the "rings" to the quilt


And now I am starting on the arcs.  I picked 6 colors I thought would go together and sewed them with a 1/4 inch seam. 


I ironed the seams to one side for strength. 


I placed the interfacing on the sewn arc to make sure I am doing it properly.


I didn't sew it in place, I just set it on top to see if the arcs matched up.   It looks OK to me!

So now only 115 more arcs to go. 

I must be nuts.

Friday, January 30, 2015

Wedding Ring Quilt


My grandmother gave my aunt a wedding ring quilt back when she was first living in California.  I don't know whether it was to be a remembrance of home, but my aunt loved it and took it everywhere.  Like to the beach and for picnics.  She loved it, but she didn't take care of it and it wore out.


She regrets that now.  So I have offered to make her a new Wedding Ring quilt.  I am cutting out all the pieces for the rings first.  I need about 700 wedges to make the rings.  I have been cutting out strips and using the template for the wedges for about a month.  I can't sit for too long as it hurts my back.  So it is taking longer than I thought.


Some people buy fabric for the rings and do it in a pattern, the same six colors for each section.  I have some bits and pieces from previous projects, so I am using them.  It is helping me to use up my bags of fabric, but I liked the fabric then and I like the fabric now.  I am trying to get colors that all work together.  When you do a scrappy quilt you just fill a basket with the colors and grab different ones and see what you end up with.  I may be a bit more picky than that and try to get colors that look good next to each other. 


Because I am cutting up bit and pieces, it was getting hard to keep track of how many wedges I had cut.  I started putting the finished piles in the snack size Ziploc bags and writing the number of pieces in a Magic Marker.  Remember not to touch the black numbers when it is still wet.  My "sewing" tip of the day.

Next I cut out the "jewels" that hook the connecting rings of fabric together.