Showing posts with label Cool Whip. Show all posts

Tuesday, June 23, 2015

Angel-Berry Trifle

A trifle is a traditional English dessert with rum soaked sponge cake, custard and fruit.  I found this lighter version and it was the perfect way to end a hearty meal.


Angel-Berry Trifle

1/2 angel food cake... from the market, easy peasy
1 quart fresh strawberries
1 pint fresh blackberries
2 cups Cool Whip
2 Tablespoons sugar or equivalent sugar substitute
3 Tablespoons rum, optional


I was making this for 4 people, so these are the amounts I used. 


Wash and dice the strawberries and place in a bowl.  Gently stir in the sugar or sugar substitute and set aside.


Slice the angel food cake and cut the slices into cubes.  I made this ahead of time and placed the cubes in a sealed container.


Gently fold the rum into the Cool Whip.  I returned the Cool Whip to the refrigerator until we were ready for dessert.


Layer the dessert by placing a large dollop of the Cool Whip on the bottom of the bowl.  Add the sliced strawberries and then the cubes of cake.  Spread another small mound of the Cool whip and then add the blackberries and another layer of the small cubes of cake.

Finish with another mound of the rum topping and the last of the strawberries.


I don't like the traditional trifle because the cake is soggy.  This version is light and satisfying. It was not too sweet and didn't make me feel stuffed or guilty for having a refreshing dessert.

Sunday, June 14, 2015

Mexican Chocolate Flan

I was perusing some Mexican recipe books and noticed that I had marked the page for Mexican Chocolate Flan as a recipe I should try.  But then I didn't.

Flan is a custard and a traditional Mexican dessert.  As far as I can tell the Mexican chocolate is just one with cinnamon.  It is easy to make, but you have to start a few hours before you want to serve it.  After it cooks it needs to cool in the refrigerator for at least an hour.


Mexican Chocolate Flan

Topping

3/4 cup sugar
1/2 cup water

Flan

1/2 cup milk
1/2 cup sugar
1/4 cup unsweetened cocoa
1/2 teaspoon cinnamon
1 can (12 oz.) evaporated milk
1/2 teaspoon vanilla
3 eggs


Heat the oven to 325°.   Get out 6 ramekins or custard cups.


Mix the water and sugar in a heavy 1 quart saucepan.  Heat to boiling over medium heat.  Cover and boil for one minute.  Uncover and cook until the sugar just starts to turn a golden brown color.  DO NOT STIR.  Do not do something else.  It can burn or get too brown, if you aren't careful.


Pour the BOILING HOT sugar syrup into the ramekins.  Swirl the cups to coat.  Set aside.


In a larger saucepan, mix the milk, sugar, cocoa and cinnamon.  I used a whisk and the cocoa powder coated the bubbles in the milk so I had chocolate bubbles!  Heat to boiling over medium high heat.  Stir constantly with a whisk.  You don't want to burn the milk or let it get a skin on top.  Boil for one minute.  Time it.


Remove rom the heat and whisk in the evaporated milk and vanilla.  Beat the eggs in a medium bowl and then temper them.  You do this by adding a bit of the hot milk mixture to the beaten egg mixture.  Mix it in.  Then add a bit more of the hot mixture to the eggs and mix some more.  I do this about 3 times and then add the eggs to the hot mixture stirring as it goes in.

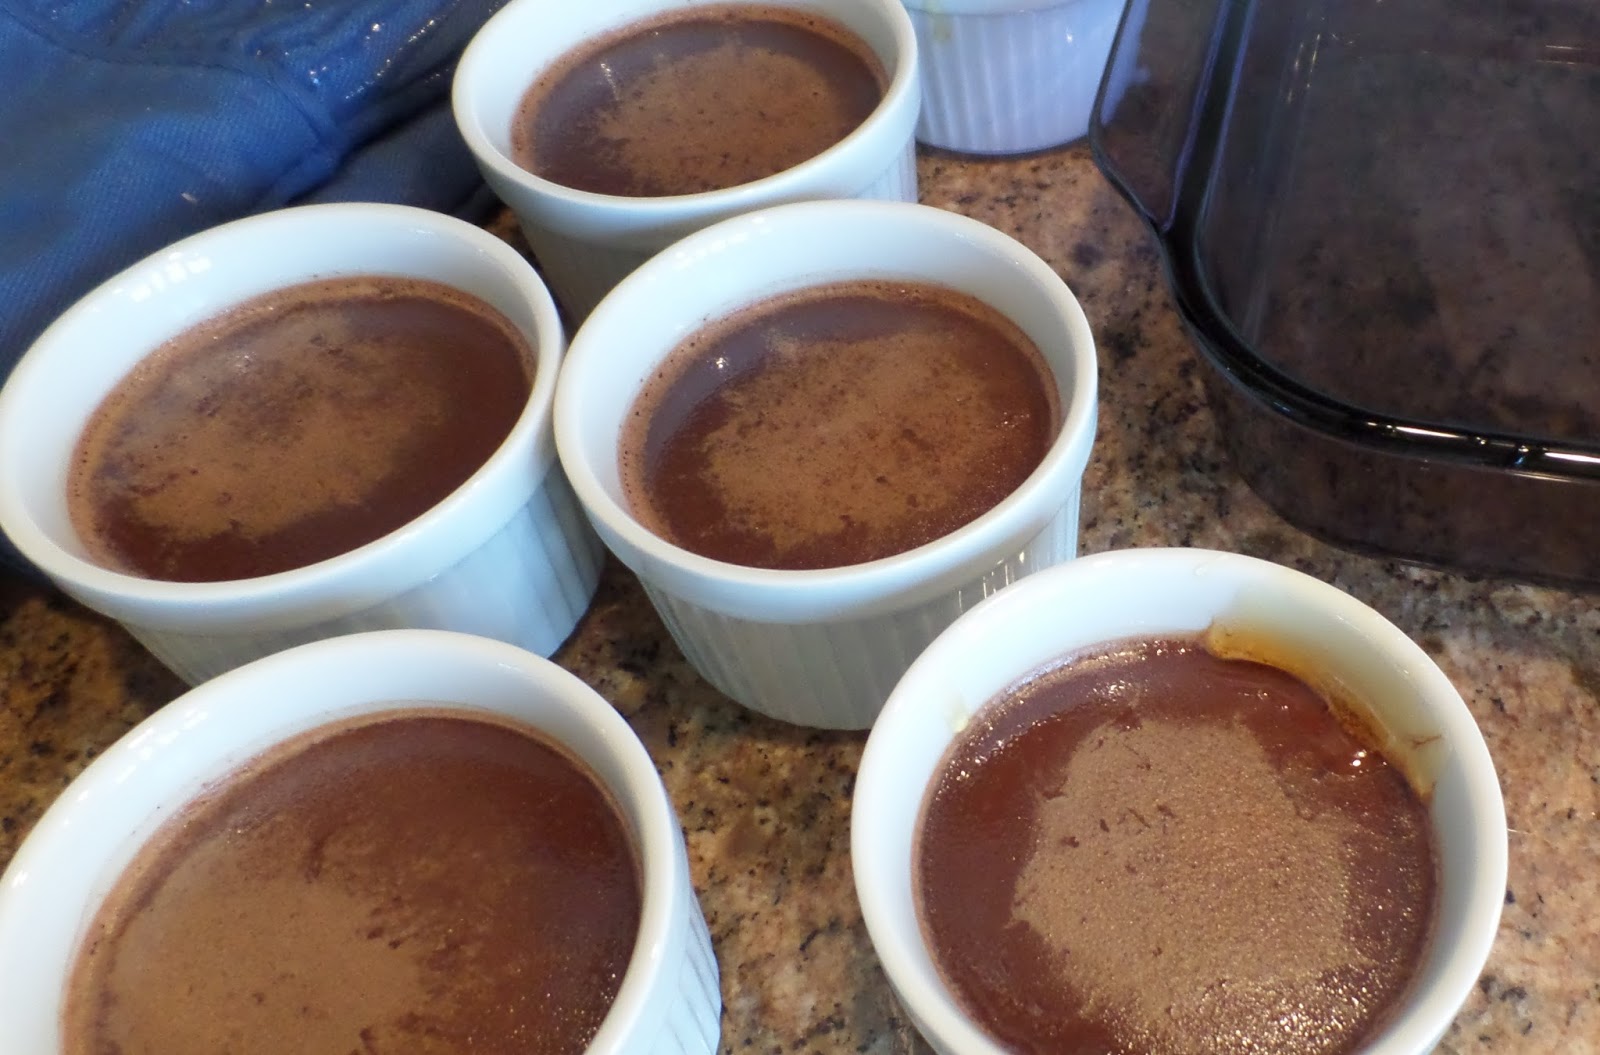
Pour the custard mix into the ramekins, on top of the sugar.


Place the ramekins in a 9X13 inch baking dish.  Take it next to the oven and then add hot water until it is half way up the sides of the cups.  Bake for 50 to 55 minutes.  Test with a knife in the middle of a flan.  If it comes out clean it is done.


Remove from the oven and let cool.  Carefully remove the ramekins from the hot water and cool some more.  Then chill in the refrigerator for at least an hour.

When you are ready to serve, fill the 9X13 baking dish with hot water and let the ramekins sit in it for about one minute.  Run a spatula around the edge of the flan and then turn it upside down on a small plate.  The syrupy topping will flow over the chocolate custard and add just the right amount of sweetness.


I like to add a small dollop of Cool Whip or whipped cream.  OK.  Ice cream would work, too.

I like the touch of cinnamon and the creamy texture of the flan.  It is a nice way to finish a spicy Mexican meal. 


Monday, March 30, 2015

Whippersnapper Cookies

I recently made some Baked Chocolate Donuts from a Joanne Fluke murder mystery.  I like her mysteries.  I love the recipes that she includes in each book.  This time I tried one of her Whippersnapper recipes.  These recipes are made using cake mix and Cool Whip.  You change up the flavors by changing the flavor of the cake mix.  I decided to try them
 
She has different ones in several of her books, but I had never tried one before.  The most recent guests at our B&B really liked them.  I made a dozen, but they only got about 8 of them.  I had to keep some for us to try.  You can't serve cookies you have never tasted!  The rest are frozen in dough balls to be thawed and baked for the next guests.


Salted Cashew and Milk Chocolate Whippersnapper Cookies

1 box chocolate cake mix
1 large egg
2 cups thawed Cool Whip
1 cup milk chocolate chips
1/2 cup chopped cashews

1/2 cup powdered sugar
18 to 24 maraschino cherries


Don't preheat the oven.  These need to chill for at least one hour after mixing.  They are too sticky to handle when first mixed.


Chop the cashews and set aside.

Whisk the egg in a medium sized bowl.  Add the Cool Whip and stir gently.


Place about one half of the cake mix from the box in a large bowl.  Fold in the Cool Whip mixture, being careful not to stir too vigorously and stir all the air out of the Cool Whip.


Place the cashews and the chocolate chips on top and fold them in.  Don't over stir.

Sprinkle the rest of the cake mix on top and mix this in.  Use a large rubber spatula and scrape up from the bottom of the bowl and bring it to the top. Mix only until combined.

Cover the bowl and place in the refrigerator for one hour.

Preheat the oven to 350°.  Don't get the cookies out next.  They need to stay cold until the oven is ready.


While it is heating, drain the cherries and cut them in half. 


Fill a small bowl with the powdered sugar.  Spray the cookie sheets with Pam or use parchment paper.  I used a Silpat.


Then get a cookie scoop and start your assembly line.  Scoop up a ball of cookie dough and place it in the powdered sugar. Roll to coat and place it on the prepared cookie sheet.  I used my thumb to make a small indentation for the cherry half.  Before I did this, they tended to fall or slide off.  Place the cherry with the rounded side up.


Only make as many dough balls as you have room to bake at onetime.  Place the rest of the dough back in the refrigerator until you can place them directly on a cookie sheet.


Bake for 10 minutes. Let the cookies cool on the sheet for 2 minutes before removing them to a cooling rack. 


When cool, store them between waxed paper in a cool dry place.  Not the refrigerator.


Monday, July 21, 2014

Blue Peach Melba Crisp

I still had some peaches from my trip to the Bryant Orchards shop in Daleville.  They are big and sweet and I wanted to make something new with them.  I had some raspberries and blueberries from our most recent guests.  Raspberries and peach make a peach melba and blueberries are Lee's favorite.  I decided to throw them all together and add a crisp topping and see what happened.


Blue Peach Melba Crisp

4 VERY large peaches or 5 or 6 regular sized peaches
1 Tablespoon lemon juice
1 cup raspberries
1/2 cup blueberries
1/4 cup sugar
2 teaspoons vanilla


Crisp Topping

3/4 cup oatmeal
1/2 cup flour
1/2 cup brown sugar
1 teaspoon cinnamon
pinch salt
6 Tablespoons butter


Heat the oven to 350°.  Butter an 8X8 baking dish. Set aside.


Peel and slice the peaches.  Place them in a medium bowl and stir in the lemon juice to keep them   from browning.  Mix in the sugar and vanilla.  


Gently add in the raspberries and blueberries, stir and add to the baking dish.


In a medium bowl mix the oatmeal, flour, brown sugar, cinnamon and salt. 


Cut in the butter until well blended.  Spread the mixture over the fruit.  Bake for 30 minutes.


This is a delicious dessert.  The raspberries dissolved completely and made a wonderful raspberry sauce surrounding the peaches.  The blueberries didn't dissolve, but became little pockets of blueberry juice that burst in my mouth. 


The crisp would have been delicious with a large scoop of vanilla ice cream.  Sadly, I didn't have any ice cream. Don't you hate it when your resistance to temptation works when you are in the freezer aisle?  I did have some Cool Whip, though, and it added a nice touch of creamy goodness.

Friday, July 18, 2014

Gingered Peach Cobbler

Our fabulous local orchard is picking peaches.  I love the peaches from Bryant Orchard.  You NEVER get peaches like this in the local markets.  I was going to make some peach cobbler or a peach crisp for my guests this weekend, but they are eating low carb.  That means no peaches and no cobbler for them.

And that it one of the reasons I am not eating low carb this summer.  Fresh fruit.  Yum.

Well, darn.  That means I have to eat the peaches.  So I decided to make up a slightly different recipe than the usual peach cobbler and invited a friend.  That way, I don't have to eat the whole thing by myself.  Not that I can't, but , you know. 


Gingered Peach Cobbler

 4 or 5 large peaches, peeled and sliced
1 Tablespoon lemon juice
1 Tablespoon cornstarch
1/4 cup sugar
1/4 teaspoon ground ginger
1/2 teaspoon cinnamon
1 teaspoon vanilla
2 teaspoons chopped, candied ginger

1 1/2 cups Heart Smart Bisquick
1/3 cup milk
2 Tablespoons sugar
1Tablesppon chopped, candied ginger
1/2 teaspoon cinnamon

1 Tablespoon chopped, candied ginger for sprinkling


Heat the oven to 375°.  Spray a 8X8 baking dish with Pam and set aside.


Peel and slice the peaches.  Place them in a medium bowl and stir in some lemon juice to keep them from turning brown. 


Add the cornstarch, sugar, ground ginger, cinnamon, candied ginger and vanilla.  Mix and set aside.


In a medium bowl place the Bisquick. milk, sugar, candied ginger, and cinnamon. 


Mix just until combined.  If you can let this sit a bit, it is a good thing.


Place the peach mixture in the prepared dish.  Drop spoonsful of the Bisquick mixture on top in mounds. 


Try to cover the top evenly , but leave spaces between each drop of Bisquick.  Sprinkle the last of the chopped candied ginger on top.


Bake for 30 to 35 minutes.  Let cool and serve.


Serve with ice cream.  And Cool Whip.  And good friends.

This had a mild taste of ginger and it was delicious.  I may try more of the candied ginger next time.  I like the bite of ginger and it was perfect with the sweetness of the peaches.

Thursday, June 5, 2014

Forbidden Rice Pudding

I frequently tear out recipes from the local paper, The Roanoke Times.  I sometimes make those recipes.  Occasionally I make the recipe BEFORE the paper yellows and becomes brittle. This recipe is for rice pudding, which is a perennial favorite.  The twist is that it is made with black rice.

Black rice was first cultivated in China and was once considered so nutritious and so rare that it was reserved for the emperor.  Forbidden for all others.  I found it at a local Kroger, so it must no longer be very rare.


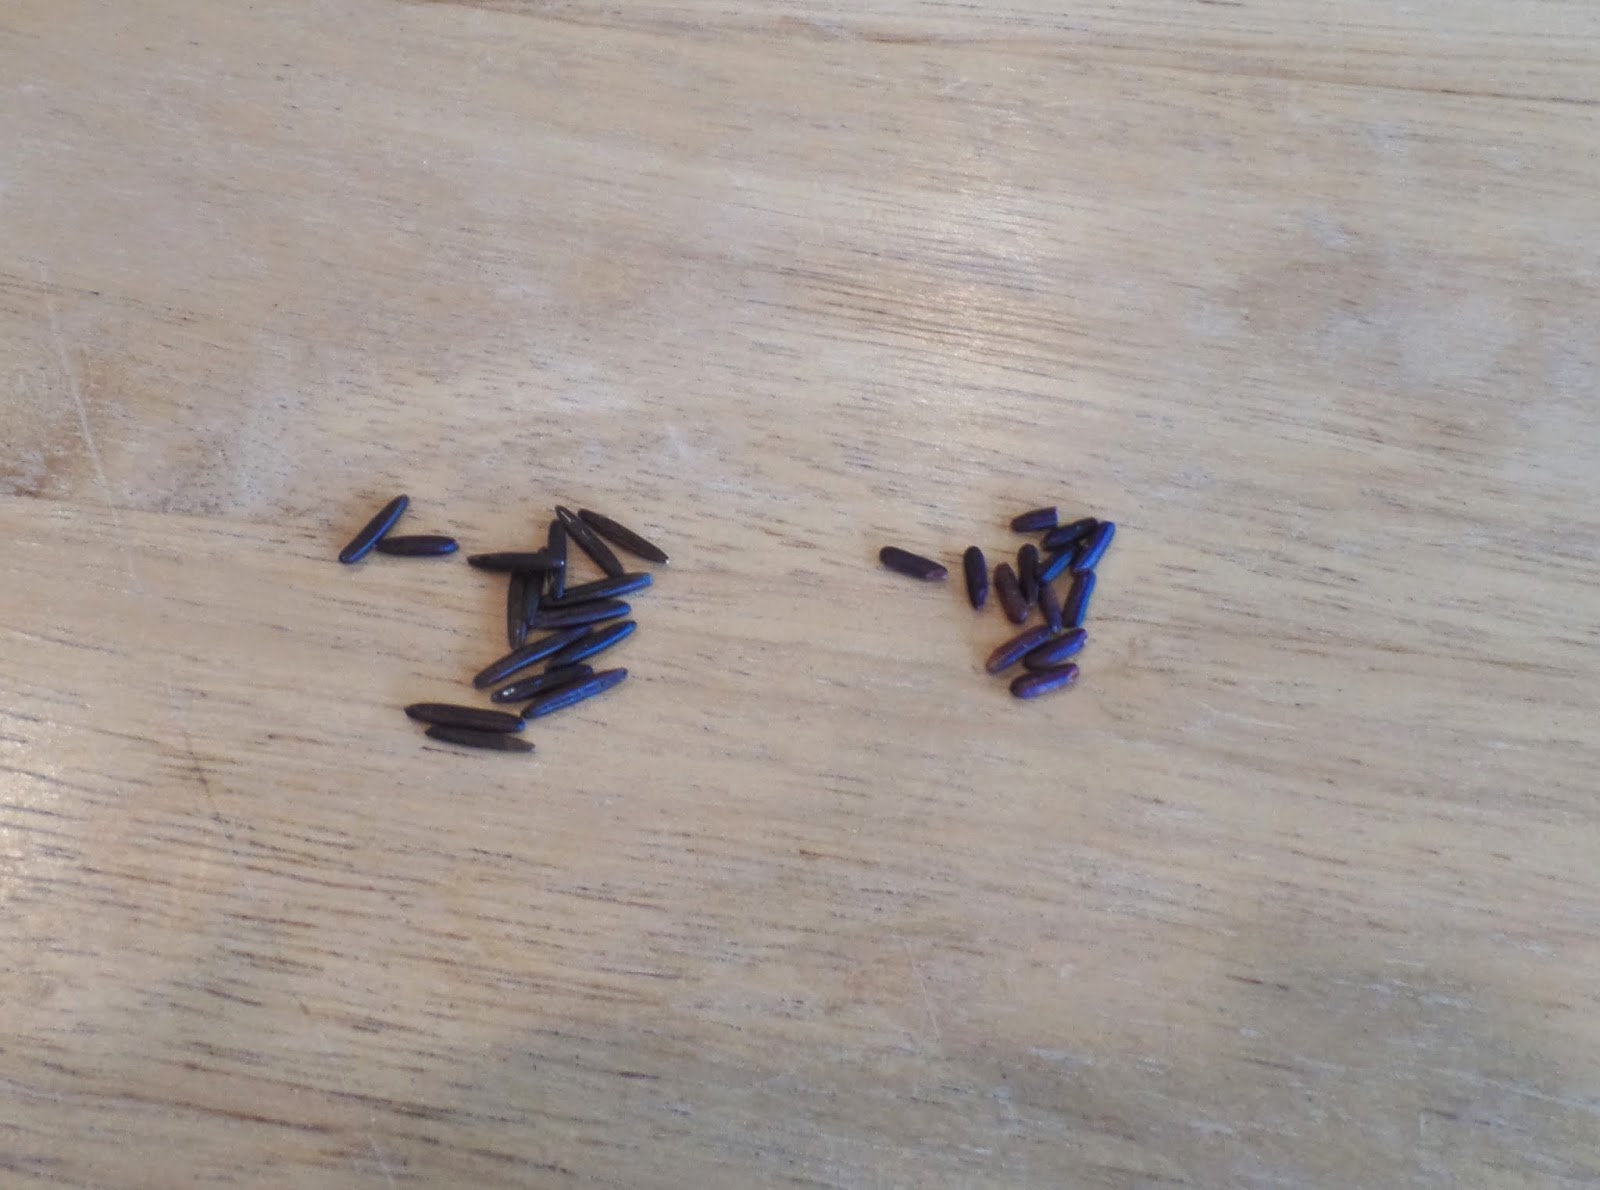
I thought it looked exactly like wild rice.  So I got some out and compared them.  The black rice on the right is shorter and more compact than the wild rice on the left

Regular rice pudding is sort of bland, but the Black Rice Pudding has a nutty flavor and is more chewy.  When you cook it, the milk turns a pretty purple color.


Forbidden Rice Pudding

1/2 cup forbidden rice ( Chinese black rice )
1 cup water
2 1/2 cups whole milk, divided use
3 Tablespoons sugar
1 large cinnamon stick
salt
2 eggs
1 teaspoon vanilla

chopped crystallized ginger for garnish


Combine the rice and water in a medium sauce pan. 


Boil and then reduce the heat to a simmer.  Cover and cook for 30 minutes.  Remove form the heat and let it stand for a few minutes.  I didn't have any excess water, but if there is, pour the rice through a strainer and return the rice to the pan.


Add 2 cups of the milk, the sugar, the cinnamon stick and a pinch of salt. 


Bring to a boil, reduce the heat to a simmer and cook uncovered for 40 minutes.  Stir every 5 minutes or so. 


When the 40 minutes are almost up, beat the eggs and the remaining 1/2 cup milk in a small bowl.  Take a large spoon of the rice mixture and whisk it in to the egg mixture.  Do it again.  And then one more time.  You are trying to temper the egg mixture  so that when you combine them, you don't have scrambled eggs in your rice pudding.  This would be bad.


Add the tempered egg mixture to the rice and milk.  Cook over medium low heat until the pudding thickens a bit, enough to coat the back of the spoon.  It will take about 4 or 5 minutes.  Do not let the pudding boil....more scrambled eggs...more bad...

Remove from the heat and stir in the vanilla.  Carefully pour the pudding into a bowl and chill for at least 2 hours.  It will thicken a bit more in the refrigerator.  What is that lump?  Oh, yeah.  The cinnamon stick.  Leave it in until you serve, then remove it.


Serve the pretty, purple rice pudding in a bowl with the crystallized ginger.  I added a bit of Cool Whip, just for fun.  And, by the way, don't skimp on the ginger.  It took a nice, nutty rice pudding and made it really good.