Showing posts with label Wilton. Show all posts

Saturday, March 21, 2015

Chocolate Baked Donuts

Yes, I know I am supposed to still be on my diet.  But I have been making progress and so I allowed myself another treat.  I just finished reading the latest Joanne Fluke murder mystery, The Double Fudge Brownie Murder. 


These books come with some amazing recipes.  This one has quite a few I will be using.  The first is the Chocolate Baked Doughnut recipe.  I made a few not critical changes and they were delicious.  I had a friend over for breakfast and will send some home with her.  Who cares if I sabotage HER diet?  Not ME.  That is the kind of wonderful friend I am...she said smugly.


Chocolate Baked Donuts

2/3 cup cocoa powder
1 and 3/4 cups flour, I used Swan's Down Cake Flour, but all purpose flour is what Ms. Fluke uses
3/4 cup sugar
1 teaspoon baking powder
1 teaspoon baking soda
1/2 teaspoon cream of tartar
1/2 teaspoon salt
2 large eggs
1/2 cup milk
1/3 cup sour cream
2 teaspoons vanilla
1/2 cup melted butter ( I used 1/4 cup or 1/2 of a stick)

1 cup semi-sweet chocolate chips.  I chose to leave these out.  The rest of the chocolate was sufficient chocolate for me as I was going to make some chocolate icing.  If you want to go for major chocolate, then add them just before baking.


Heat the oven to 350°.


Spray the donut wells in a Wilton pan with Pam.  I don't know of any other donut pan other than Wilton.  Set aside.

I chose to sift the Cake Flour with the cream of tartar, baking powder and the baking soda.  Add it and the cocoa powder to a mixing bowl, with the salt and sugar.  Mix on low speed.


Add in the eggs, keep mixing.  Then add the milk, sour cream, and vanilla and mix until combined.  While the mixer is still running, drizzle in the melted butter and mix until smooth.


Use a rubber spatula to give one last stir.  This is also the time where you can fold in the cup of chocolate chips, if you like.


I like to use a 1/4 cup measure to fill the donut wells.  In fact, each one takes about 1/4 cup.  You should fill them a bit more than 3/4 of the way full.


Bake for 12 to 15 minutes.  Test with a toothpick in the middle of the baked part of one of the donuts.  If it is clean, you are done.  If not, bake a few more minutes.  Mine was done at 12 minutes.


Set the pans on a rack or a cold oven burner for 2 minutes to cool.  Use a plastic knife to loosen all around each donut.  Tip them over a cooling rack.  Not all mine came out easily.  Some I had to work at with the plastic knife and gently tugging at them.  Let them cool completely before icing.

Chocolate Icing

1 cup semi-sweet chocolate chips
2 Tablespoons butter
2 Tablespoons cream

1/4 cup peanuts, chopped coarsely, Optional


Place all the ingredients except the nuts in a heatproof bowl large enough to hold a donut.  Melt in the microwave for 1 minutes.  Let sit in the microwave for another minute and then stir.  If chips are not completely melted, return to the microwave for another 30 seconds.


Once the chocolate mix is smooth, dip each donut and then place on waxed paper.  While the icing is still warm, sprinkle the chopped peanuts on top, if you are using them.


Let the chocolate set for a bit and then enjoy.  These are best served the same day.  If you can't finish them all, or give them away, place them in a covered container.


Wednesday, November 19, 2014

Baked Lemon Sour Cream Donuts

I bought some lemons and then didn't use them.  I started searching for something I could bake to use them up.  I opened a drawer to get out a casserole dish and saw my Wilton donut pans.  What a good idea.  Lemon donuts!  But not just lemon.  How about I use some sour cream?  Sounds like a plan.

And while donuts are not usually considered healthy, these are baked, not fried.  And I used lemon which is a fruit.  So there.


Baked Lemon Sour Cream Donuts

2 cups flour,  I used

1 cup flour
1 cup cake flour because that is all the cake flour I had.  I can't tell a difference between cake flour and regular flour, but I am new at this donut baking business.

1 1/2 teaspoons baking powder
1/2 teaspoon baking soda
1/2 teaspoon salt
1/4 teaspoon nutmeg
3/4 cup sugar

3/4 cup sour cream
1/3 cup milk or buttermilk if you have it.
2 eggs
1 Tablespoon olive oil
1 teaspoon lemon extract
zest of one lemon  Go ahead and zest two because you will need some for the


Glaze

1/3 cup powdered sugar
zest of one lemon
1 drop yellow food coloring, optional
1/4 teaspoon lemon extract
3 teaspoons milk or I used half and half

The glaze is optional.  You can just dust the finished donuts with powdered sugar.  It's a lot faster and cleaner, but not as lemony.


Heat the oven to 425°.  Spray the donut pans with Pam and set aside.


Sift all the dry ingredients into a large bowl.  Break the eggs into a bowl and beat them with a fork.  Add the eggs and them all the rest of the wet ingredients, including the zest from one of the lemons.


Carefully mix until blended and them use a small measuring cup to fill the donut shaped depressions in the prepared baking pan.


I wet a paper towel and cleaned off the middle peg where the batter spilled.  Bake for 9 to 11 minutes.  The surface should spring back when touched and they should just start to brown.  The bottom will be a lot browner than the top.

Let cool and them remove to a cooling rack.  When cool dust with powdered sugar or glaze.


Mix all the glaze ingredients in a small bowl.  You may add sugar it is too thin or milk if it is too thick.  I made mine a bit thin as I didn't want to overwhelm myself with sugar.  Place a piece of waxed paper under the cooling rack to catch the drips and drizzle the glaze over the donuts. 


Enjoy with a hot beverage or glass of milk. 

Monday, June 9, 2014

Baked Donuts

I like to wander up and down the Wilton aisle whenever I am in a store that carries their baking items.  You never know, I might find something I have to have.  Hey, look at this?


Pans for baking donuts.  I guess you can't exactly have a healthy donut, but a less unhealthy one sounds good to me!

I had company and that is always a good time to experiment with a recipe.  They can give a candid opinion and I don't get stuck eating too many treats all by myself.


Baked Donuts

2 cups cake flour
3/4 cup sugar
2 teaspoons baking powder
1/4 teaspoon nutmeg
1 teaspoon salt
3/4 cup buttermilk
2 eggs
2 Tablespoons butter

Optional
blueberries
powdered sugar
cinnamon sugar
chopped peanuts
chocolate glaze, recipe below


Preheat oven to 425°.  Spray the donut pans with Pam.  Set aside.

Melt the butter and let it cool a bit.   I didn't have buttermilk, so I had to make a substitution.  I placed a teaspoon of vinegar in 3/4 cup of regular milk and let it sit while I got the rest of the ingredients together.


Place a sifter in a large mixing bowl and fill it with the flour, sugar, baking powder, nutmeg and salt.  Sift.  I found a few grains of sugar that would not sift and I just dumped them in with the rest of the dry ingredients.


Whip up two eggs with a fork.  Add the buttermilk and pour it into the flour mixture.  Add the cooled, but melted butter and beat until just combined.

Fill each donut cup until 2/3 full and bake for 7 to 9 minutes.  The tops should spring back when gently touched. 

Let cool in the pan for 5 minutes until removing.

Glaze with chocolate or powdered sugar or cinnamon sugar.

Here's what I did.


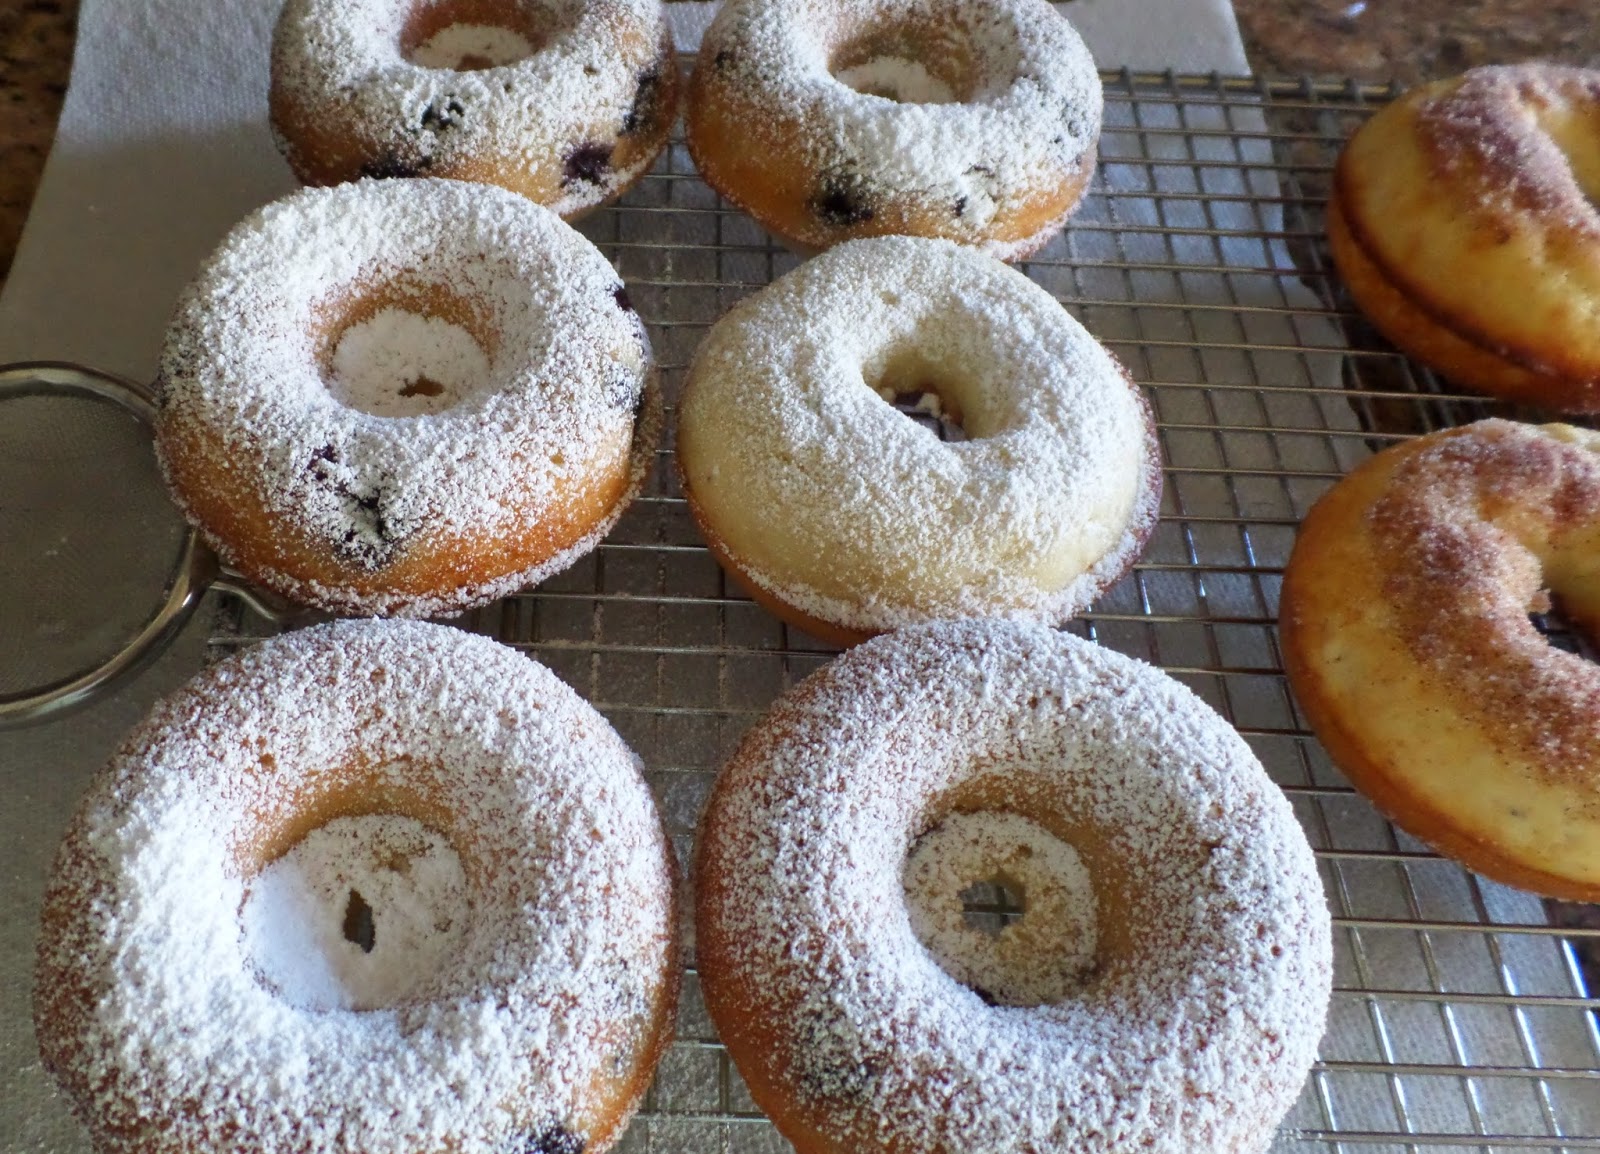
I made half with the plain batter and then I added 1/2 cup of blueberries to the remaining batter and filed the second donut pan. 


Here's what I also did.  I got the bottoms browner than the tops. 


I sprinkled powdered sugar on top of the blueberry donuts and I dipped the plain donuts in melted butter and then pressed them into a bowl of cinnamon sugar. 


Both were pretty good.


On another day, I turned the heat down and baked longer to eliminate the disparity between the tops and the bottoms..  They were done before they got brown.  Guess the 425° was right after all.  I didn't like the paleness of them, but they tasted OK.  I guess I'll stick with the higher temperature! 

For the topping for the pale donut,s used the Wilton recipe for chocolate glaze

Chocolate Glaze

1/2 cup chocolate chips
2 Tablespoons butter
2 Tablespoons corn syrup
1-2 teaspoons hot water


Place the chocolate chips, corn syrup and butter in a microwaveable bowl and heat on 50% power for 30 seconds.  Stir.  You may have to put it in for longer to get everything melted.  Do not over heat.

Add 1 teaspoon hot water and stir until glossy.  You may want to add another teaspoon of water if it is too thick.


Dip the donuts in the glaze and if you are lucky, someone will have chopped you up a 1/2 cup of peanuts.  Dip the chocolate covered donuts in the peanuts and let set for a few minutes.  You won't even notice how pale they are!


I don't have a particular favorite.  Just don't put in too many blueberries as it is hard for the donut to hold together when you are removing the warm ones from the pan.  And really, it is hard to beat chocolate and peanuts.  However,  the pop of warm, sweet blueberries was particularly nice.  But then, who doesn't like cinnamon sugar??

Wednesday, February 12, 2014

Pie Pops with Nutella Filling


This week I was tasked with baking something for the Buchanan Library story time participants.  I wanted to make something Valentine's Day related and did some aimless searching on the Internet.  This is far more fun than working.  I thought about getting some smaller heart shaped cookie cutters.  I have a BIG one.  I even went so far as to put a set and a few other things in my cart on Amazon.com.  I purposely spent more than $25.  Love that free shipping. 

Uh-oh.  Yes, I had forgotten that free shipping was only if I spent $35.  I could spend 9 more dollars for free shipping, or spend $14 and get just what I wanted shipped.


Well, that irritated me.  So I went to A.C.Moore and looked there.  I found cutters for Linzer cookies from Wilton .  You cut out two heart shapes from rolled out cookie dough.  Then cut a smaller shape in the middle of one of them.  Sandwich the two hearts together and fill the center cut-out with jam.  Bought it.  No shipping charges.

I also wanted to visit The Cook's Nook, a store for, wait for it, COOKS.  As long as I was making the trek into Roanoke, I thought I would check out the store and see what they had. It was full of fun stuff for baking and look what I found.  A Tovolo pie pop kit.


The premise here is you cut out circles of dough.  Then you fill the center with a sweet or savory filling, add a stick and the top crust, press and bake.  Then you have pie on a stick.  How cute it that?

Because it was for a Valentine's Day themed party, I chose a chocolate filling.  Next time I want to try the onion, bacon and gruyere filling.  And maybe leave out the sticks.  That is for display and I just want to gobble them up.  No gobbling at the moment.  Diet. sigh

Pie Pops with Nutella Filling

2 Pie crusts, I used store bought
butter
flour
raw or Turbinado sugar for sanding

2 cups Nutella
2 eggs, divided use
1/4 cup flour, plus for dusting


First make an egg wash.  Crack one egg in a small bowl.  Add 2 Tablespoons water and whisk.  Set aside.  Save the whisk to stir it up from time to time.


Pre heat the oven to 350°.  Prepare the baking pan that came with the set. 


It has little depressions that keep the pie pop from being flat on the bottom.  It has a non-stick coating, but I buttered and floured it just in case.  Butter and flour the inside of the little red cutters.


Sprinkle some flour on your very clean and dry counter top.  Unroll one pie crust and cut out as many shapes as will fit without overlapping.  Use the top grid to press gently into the cut-outs. These are the tops.  Set the tops aside and cut the bottoms of the crusts.  I got 14 from one and only 13 from the other.  What's up with that?  I kneaded and rolled up the scraps to cut one more.  This made a total of 14 pops.


If you want, you can roll out the left over bits of crust, brush them with the egg wash and sprinkle with sugar and cinnamon.  Use a pizza wheel to cut them in rectangles and bake along with the pops.  Yum.  I didn't, but I remember the yum.  sigh

Now to make the filling.  You can purchase pie fillings.  Everything from lemon curd, apple, even mincemeat.  The apple would have to be chopped up into smaller pieces, though. I wanted to make a chocolate filling, because nothing says Valentine's Day like chocolate...unless it is jewelry!  But I didn't want the little darlings to break all their teeth, so I went with chocolate.

This recipe made almost twice as much as I used for 14 pops.  You can cut it in half or make more pops.  But then you would need more pie dough.  Up to you.


Place the Nutella, egg and flour in a mixing bowl.  I used a Kitchen Aid.  I was supposed to beat until smooth, but it kept getting tighter, so I stopped.  I think that may be because it is so cold here.  It was hard to get the Nutella out of the jar.  In the summer it is easier.  I noticed it is 80 degrees in LA.  So make these in LA.  : ))


Now for the assembly line.  Pick up a bottom (one with out the grid) and hold it over the bowl with the egg wash.  Use a pastry brush to paint egg wash all around the outside edge.  Place it in the press with the little tongue towards the indent for the stick.  


I used the smallest cookie scoop to set a ball of Nutella in the center of the crust.  Gently press a pie pop stick into the Nutella ball.  Get it all the way in the pie clear up to the edge, but not touching.  I tried, once  to just get it partway in to avoid biting it, but then the pop has no stability and falls over.


Hold a top crust over the egg wash and paint the inside edge. Place the egg wash side on top of the Nutella and stick.  Take the top of the press and firmly press closed.  It gets easier after the first few pops.

There is a convenient hole in the bottom press to push up on the pie and get it out of the mold. Do not hold it by the stick.  Place it in one the indentation of the pan with the grid up and finish making pops.


When the pan is full, brush the tops with the egg wash and sprinkle with raw sugar.  This will make it shiny and sweet with an extra bit of crunch.

Bake for 11 to 15 minutes or until golden brown.  Don't over bake or the tops may split.  My tops wouldn't brown and I kept increasing the time and a few split.  Next time I will increase the heat for my oven to 375°...wonky oven.

While they are baking you can assemble the rest of the pops.  They hold their shape well when held from the bottom.

Let cool a few minutes on the pan and then transfer to a cooling rack. The top of the kit holds them for display.  Be careful when removing them.  The top wants to come with the pops.


Take them to the Buchanan Library and display them with all the other goodies for those lucky kids.  But first give one to Sara.  She is a regular at the library and volunteered to be my taste tester and model.  It is a bad idea to poison children as a way to increase attendance.  At least that was my thought.


It occurs to me that I didn't have the same care for a potential poisoning for Sara.  But the little kids are so sweet and cuddly!   And Sara is a teenager.  : ))  Well, in truth, I wasn't worried about poisoning, merely that it would taste good.  And Sara is a good sport and photogenic.  And she liked them!


And so did the kids.  Well, really, their parents liked them better than the kids.  They went for the drinks and the chocolate.  But if you can get the parents in, they will have to bring the kids and then the library has more patrons.  And that's a good thing.

Monday, May 13, 2013

Defeated By Italian Butercream


Mother's Day was our 34th anniversary.  No, I don't have any hints for you on staying married.  Other than pick well...and don't plan on a divorce if things don't work out as you thought they would.  They NEVER turn out the way you thought they would.


That being said, I decided to make Lee a cake for our anniversary. I had bought him a gift or two and ended up giving them to him earlier, and now I only had one small gift to give him.  He loves chocolate cake (but who doesn't?) so that would have to suffice.  It is a very involved cake, taking up FOUR different pages in my purchased, but unused Tea With Bea cookbook.  I planned on making that and then another gift of food from another cookbook that the kids (can they be kids when they are all over 21? ) gave me for Mother's Day.  Or, as they call a similar day in the UK, Mothering Sunday.  That did not work out as planned.

First I made the cake.  It took almost every bowl in the house.  And then I had two more things to make for the cake, the buttercream filling and the icing, but the Italian buttercream kicked my...well, it was very difficult.  I have made the Wilton buttercream many times and it always turned out perfect.  This time I wanted to make the fancier version.  I may never try it again.  On the other hand, I HATE not being able to do something I start out to do, so I may have to revisit that decision.

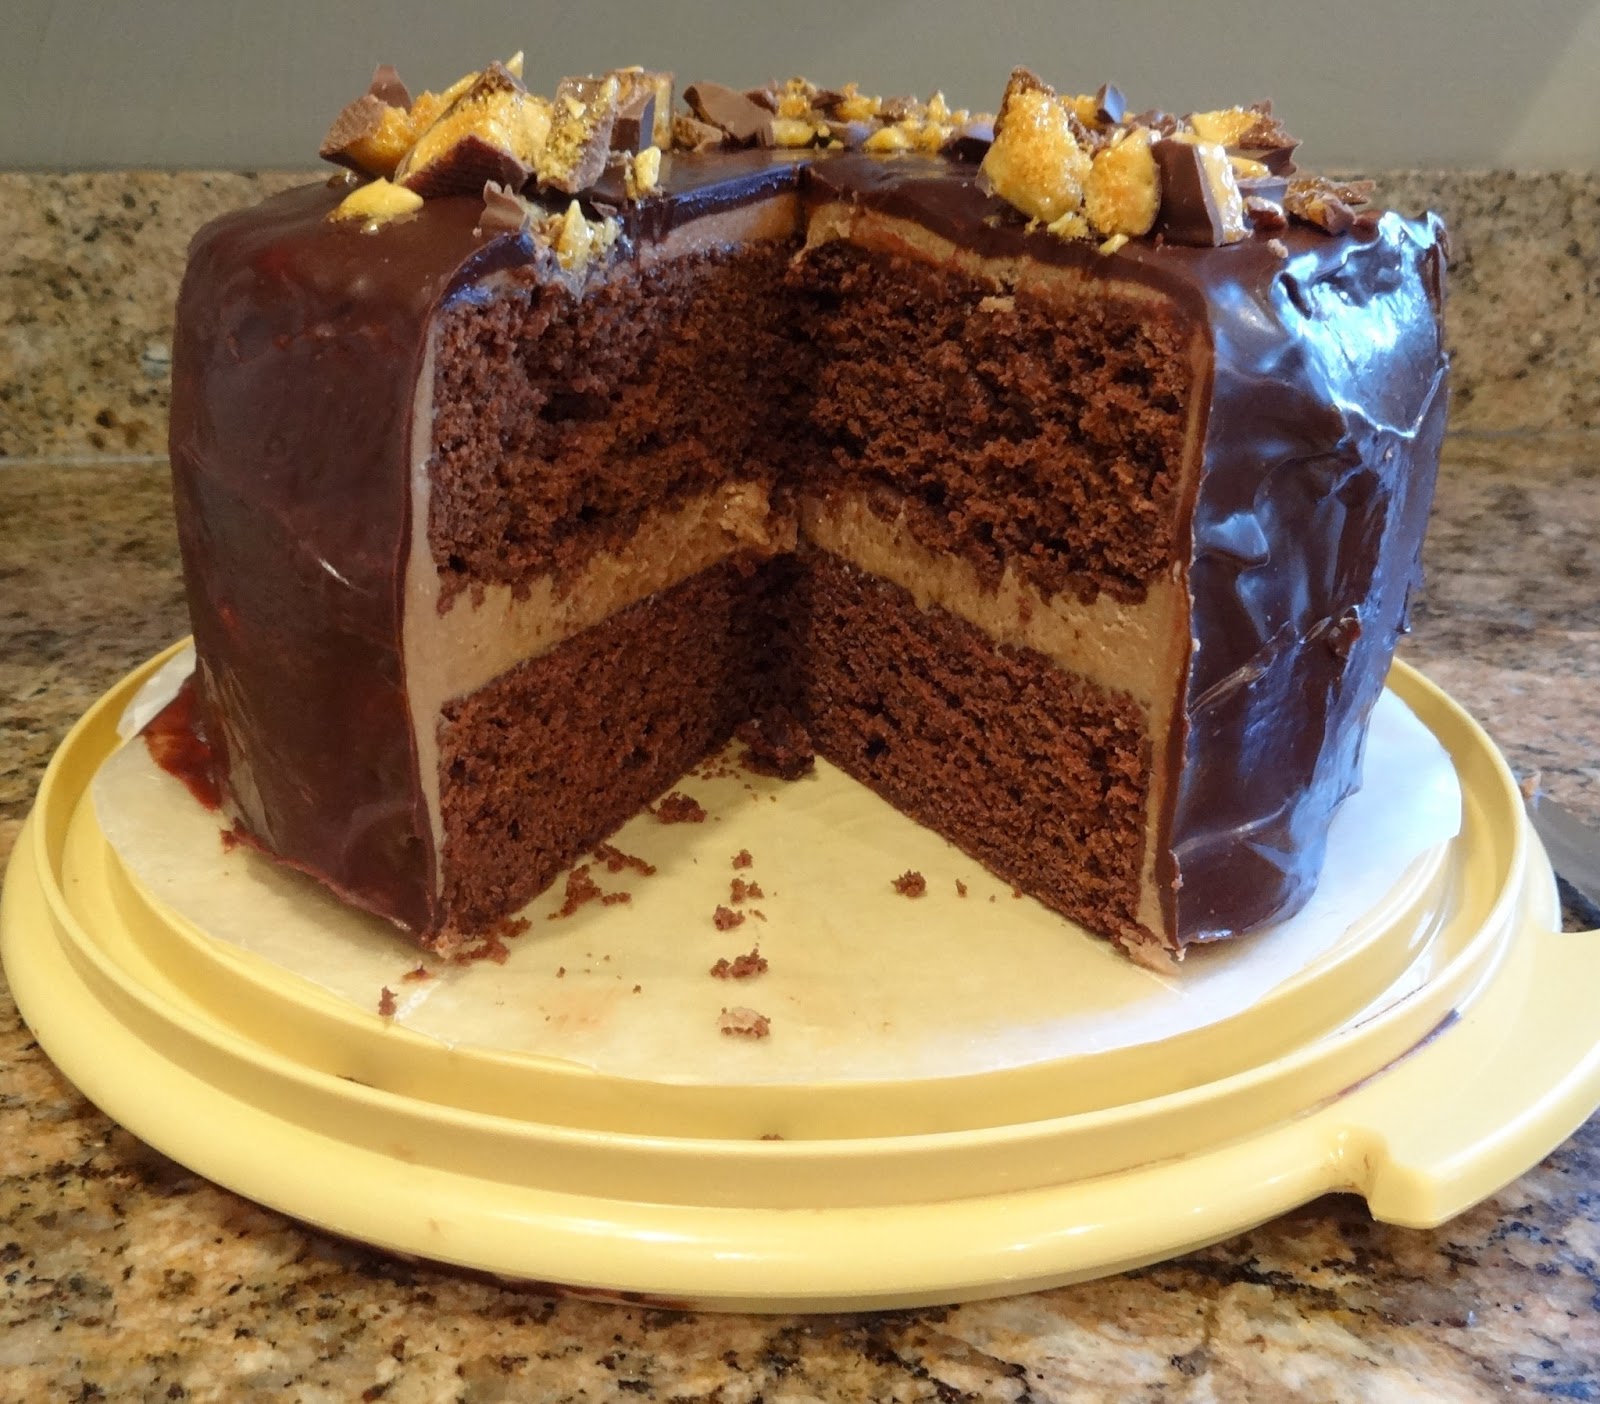
The Triple Chocolate Cake starts with the Chocolate Buttermilk Cake.  Then it is filled with the Italian Buttercream, which is also used for a crumb coat and chilled.  Then the Fudge Icing is poured over the chilled cake.  THEN you decorate with honeycomb candy.  I was going to make some honeycomb, but Trista brought me some from England I  decided to just crumble them up and have done with it!


Feel free to make a portion of this recipe.  Just the cake or just the buttercream or just the icing.  Or substitute a Wilton buttercream.  But if you REALLY love someone, do the whole thing and maybe you, too, will be married for 34 years! 

Triple Chocolate Cake

Before you get started, notice that you will need a BUNCH of eggs and unsalted butter.  And a BUNCH of chocolate.  Make sure you have enough.

Chocolate Buttermilk Cake

8 oz. semi-sweet chocolate bar, cut into peas sized pieces
4 Tablespoons cocoa powder
1 1/2 sticks unsalted butter
4 eggs
1 1/2 cups sugar  (the recipe called for superfine sugar, which our market does not carry)
1 1/4 cups flour
1/2 teaspoons baking soda
1/4 teaspoon salt
1 cup buttermilk


Prepare one 10 inch or two 7 inch cake pans by greasing them and then cutting parchment paper to fit into the bottom.  Gently grease that, too.  The easiest way to cut the paper is to place the pans on the paper and then draw a line around the pan.  Cut the paper and stick it to the greased bottom of the pan.  I only had 8 inch cake pans and that is what I used.


Preheat the oven to 340. 


Put the cut up chocolate and cocoa powder in a large, ceramic or glass bowl. You will be putting hot stuff in it.


Melt the butter in a sauce pan over medium high heat.  Keep a close eye on it.  You don't want it to brown.  Pour it on top of the chocolate and stir until smooth.


In another bowl, whisk together the eggs and the sugar.  The superfine sugar would probably dissolve into the eggs easier than the regular granulated kind, but that is not what I had or used.  By the time it is thoroughly mixed, the chocolate should have cooled sufficiently.  I did put a small bit of the melted chocolate into the eggs and stirred.  Then I added another small bit of the melted chocolate into the eggs and stirred that in.  This helps to temper the eggs and warm them a wee bit without making scrambled eggs in your dish. Add the egg mixture to the chocolate and mix until well combined.  Set it aside.


You will need two mixing bowls and one sifter for this next part.  Place the sifter in a bowl and measure in the flour, soda and salt.  Sift it into the bowl.  Now place the sifter in ANOTHER bowl (see what I mean about the bowls?) and scoop the sifted flour into the sifter and sift again.


Add about 1/3 of the flour to the chocolate mixture and mix it in.  Add 1/2 cup of the buttermilk, mix.  Then add another half of the remaining flour to the chocolate, mix.  Add the buttermilk, mix and then the remaining flour and mix until thoroughly combined.

Spoon the batter into the prepared pans.  I used two pans because I didn't want to try to cut the 10 inch cake into layers.  It seemed easier to already have the cake in layers!

Bake for 35 to 45 minutes.  You will probably need the longer time for the larger pan.  I used the shorter time for the two pans.  Check to see if it is done with a toothpick.  If it comes out with just a few crumbs on it, it is done.  I used this time to wash pans and get the kitchen cleaned up to start on the rest of the cake.


Remove from the oven and cool for 10 minutes.  Then gently slide a knife around the edges and tip the cake out on a cooling rack.  Cool for one hour.  You will need it for the buttercream!  If you used the 10 inch pan, cut the cake into layers after cooling.


Chocolate Italian Buttercream

Temperature is the key to this working out.  Do not have the TV on or get distracted by talking to people or reading a book, even a cookbook for the next step, while waiting for the sugar to come to the right temperature.  Don't ask me how I know this!

2 1/2 oz. semi-sweet chocolate, roughly chopped

1 3/4 sugar, if you found superfine, use it here
1 Tablespoon corn syrup...the recipe calls for golden syrup, not available here, so this is acceptable
1/2 cup water
6 egg whites
5 sticks unsalted butter...you can diet next week.  Cut the butter into big chunks and let it soften

If you want another flavor rather than chocolate, leave out the first ingredient and add vanilla or another flavor at the end.


Melt the chocolate in a double boiler and set aside to cool.  I don't have a double boiler, so I used a metal bowl loosely on top of a simmering sauce pan half filled with water.  Do not let the water touch the bowl with the chocolate.

Place the sugar, syrup and water in a medium sauce pan.  The first time...yes, I had to do it TWICE,  I think the pan was too big and the thermometer wasn't deep enough in the boiling sugar mixture to register the proper temperature.  The second time I used a smaller pan and got a better reading. 

The temperature seemed to stay around 225 for the longest time and then it popped up and I almost ruined the second batch.  Watch closely and remove the sugar from the heat as soon as it hits 248 degrees.

While the sugar cools, start on the egg whites. You can get everything ready, but don't start them until the sugar is cooling. It needs that time to cool down and if the sugar doesn't work the first time the whipped egg whites will sit too long while you fix the sugar syrup again.  Don't ask how I know this.

NOW you can use your Kitchen Aid mixer.  Before, everything needed to be done in such a way as to make it unnecessary.  Whipping eggs is a GEAT use for the Kitchen Aid.  Plus, you need to use a heat proof bowl for the egg whites and you will have that.  If you don't have a stand mixer, you will need someone to help you later.  Use the whisk attachment and whip the eggs into soft peaks.


I saved the yolks for breakfast the next day and just added a few extra eggs to them for a nice scramble.  Actually, Lee did, for my breakfast in bed.  Remember where I mentioned the picking the right husband?

Now the sugar syrup will have cooled sufficiently.  While the whisk is running, pour the syrup in a steady stream into the whipped eggs.  This is where you will need help if you are using a hand held mixer.  Try to keep the sugar syrup from hitting the whisk.  Continue whisking until the meringue cools slightly. 

If it is too warm, the butter will melt and it will not come together.  Then you will have to use the refrigerator trick two paragraphs down!


Add the softened butter one third at a time and let it whip until fully incorporated.  You can add the flavoring of your choice at this time.  I added the melted chocolate and kept the mixer going until it was a lovely mocha color.

Because I had to remake the sugar syrup, the eggs sat too long and the whole thing did not come together well.  Do not despair!  There is a fix.  I put the buttercream into the refrigerator for one hour and then whipped it again.  Perfect.


The instructions say it will keep for a week at room temperature.  They obviously have not met Lee.  Left over buttercream lasting a week?  Suuuure!


Place the first layer upside down on a cake stand or plate.  Use a bit of the butter cream first to hold it in place.  You DID peel off the parchment paper off the layers, right?  Put a big glop of the buttercream on top and cover it in an even layer. 


Then place the other layer right side up on top of the butter cream and spread a thin layer of buttercream on the sides and top.  Place the cake in a refrigerator and chill for an hour. 


Do not take too long of a break.  You still have work to do.  Grab a bite to eat and get started on the...


Fudge Icing

1 cup whipping cream
3 Tablespoons golden syrup or just use corn syrup, like I did
12 oz. semi sweet chocolate, chopped into pea sized pieces...see what I mean about having enough chocolate for this recipe????
1 teaspoon vanilla extract
5 Tablespoons unsalted butter, cut into cubes and chilled


Place the cream and the syrup in a medium saucepan and bring to a boil. 


You did wash everything during your meal break, right???


Put the chocolate into a large heat proof bowl (ditto on the washing).  As soon as the cream comes to a boil, pour it over the chocolate.  Wait for one minute.


Use a small balloon whisk and start in the middle of the bowl.  Gently whisk in small circles.  Don't stray from the middle of the bowl.  You are slowly adding the cream to the chocolate. 


Large motions and heavy stirring will break down the emulsion and you will end up with a grainy mixture.  You also don't want air into the mixture as it will make unwanted bubbles and will shorten the life of the icing.


Keep stirring with small motions and slowly stir in wider circles, incorporating the cream into the chocolate until it is fully combined.  It will look like nothing is happening and then it will turn into a  very shiny, thick mixture. 

Add the vanilla and the butter and mix until well combined.  Take a clean spoon and dip it in the mixture and taste it.  Not to make any changes.  You will just want to taste it!  Let it cool.

Clean all the bowls in the house AGAIN!

If the icing has cooled too much, you may need to warm it gently in the microwave for 10 seconds at a time.  You want it to be smooth, and a pourable consistency.

Take the cake from the refrigerator.  Cut strips of parchment paper or waxed paper and fit them under the edges.  This will help you clean up later.


Carefully pour the icing over the chilled cake, making sure the sides are covered all around. Carefully remove the waxed paper strips with the puddles of icing.  Let it cool and set slightly and the decorate with chopped honeycomb or other chopped candy bars.


Then eat a slice, accept accolades, and go into a chocolate coma to rest from your labors.

Happy Anniversary!

And don't worry.  I wasn't left out.  I got an iPad!