Monday, January 27, 2025

A Multitude Of Ducks

 I have a friend who has figured out how to cruise on a budget.  When she can get a great deal on a cruise she'll go!  Lately she has been telling me about duck culture on a cruise ship.  It seems guests are bringing ducks and hiding them. 

No, not real ducks. I guess it started with rubber ducks.  The kind kids play with in the tub.  Then they started buying tiny ones in bulk on sites like Temu. Some people branched out into other tiny cute things. Or they glue magnets to whatever duck items they have bought. Then the other cruisers interested in this started to search the giant cruise ships trying to find the most ducks and posting about it.  The staff sometimes get into it.  They use them to decorate their small quarters or to take home to their children.  

Then Marcy told me about classes being offered by guests to learn to crochet ducks. Marcy can't see well enough to crochet, so she thought I could make her some.  I found some patterns on Etsy and got busy.

I have some yarn left over from other knitting projects.  I started with that.  Then JoAnn Fabric had a yarn sale.  So I bought a bunch and kept going.  I stuck with one pattern as I could make them faster that way.  

I played around with the colors for a Mallard duck. I tried a poof on top. 

I used different thicknesses of yarn and different sizes of crochet hooks. All the ducks I made had the same pattern but they turned out different.  That made it more fun for me.

For my first ducks, I embroidered an eye while I waited for some safety eyes to get here from Temu.

 Then I used those for the eyes.

I shipped off a box of more than thirty this morning. I know she can't fit all of them in her suitcase, but this should last her for awhile. 

Now I can use some of that yarn I bought to try to figure out how to make some other animals or at least different patterns for the ducks.

Buttery Sandwich Bread

 Making bread has become a regular thing for me.  And not just the same kind of bread.  I'm having fun exploring new recipes.  Maybe I'm enjoying it because it has been so cold this winter.  

Kneading and baking and then posting the recipes keeps me busy and warm when I can't really do anything outside.

Buttery Sandwich Bread

1/2 cup warm water

2 cups warm milk

2 packages yeast

1/4 cup sugar

1/2 cup (1 stick) room temperature butter, cut in pieces

1 Tablespoon salt

6 cups bread flour

Because it is cold, I warm the bowl of the mixer.  I fill it with hot tap water and sit it aside.  

After I get out the bread ingredients, I dump out the water and put in 1/2 cup warm water, sugar and yeast. 

This activates the yeast and it will bloom to show that it is still alive.

Heat the milk until warm.  I tested it on my wrist like I would for a baby bottle. If it's too hot it will kill the yeast.

Add the warm milk, 2 cups flour, cut up butter and salt.  Mix slowly with the dough hook.  If you don't have a Kitchen Aid mixer this can be done by hand, but it will get harder to mix as you add more flour.

Add about 1 cup at a time and mix slowly with the dough hook.  The dough came together after I had about 5 1/2 cups in the mix.  It pulled away from the sides of the bowl. I mixed for about 4 or 5 minutes, then I scraped out the dough onto a floured surface.

The dough was still sticky so I sprinkled some of the additional 1/2 cup of flour on top and began kneading.  Even though I have a dough hook, I like the process of kneading and I can tell when it has absorbed all the flour it needs and it is smooth and not sticky.

Put a Tablespoon or so of vegetable oil in a large bowl.  Spread it ip the sides and place the dough ball in the bowl.  Turn it around until the dough has oil on the surface. 

Cover with plastic wrap and place in a warm spot for about 1 hour or until it has doubled in size.

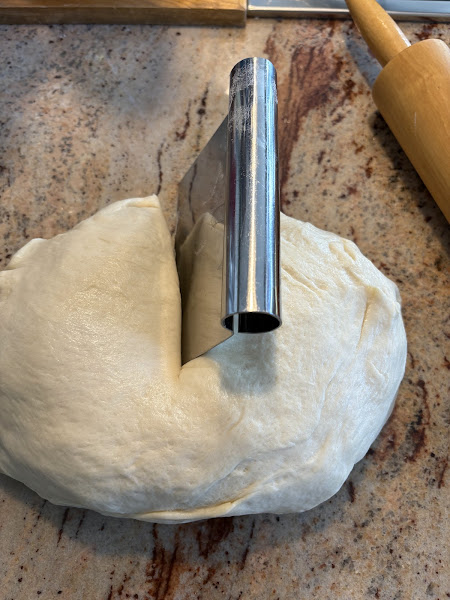
Spray two bread pans with Pam.  Punch down the dough and cut it in half.  

Roll each piece out into a rectangle about 8 X 12 with a rolling pin.  

Roll it up tightly from the short side.  

Pinch the edges closed and fold the ends over.  Pinch those creases, too.

Place each dough "log" in a bread pan with the seam side down and cover it with the saved plastic wrap. 

Let it rise for about an hour or until it rises above the edge of the pan. 

Preheat the oven to 350°. Remove the plastic wrap and place the pans in the middle of the oven for 30-35 minutes.  The bread should be a golden brown and sound hollow when tapped.

Brush melted butter over the top.  

Let cool a few minutes and then turn them onto a cooling rack.

Cool the bread about 20 minutes.  When just warm, cut a slice and try it.  I like my fresh bread plain and also with a bit of butter

We can't eat two whole loaves before they will go bad.  I freeze one loaf.  This time I took the suggestion I saw on a blog and wrapped some of the pieces I was going to freeze. 

I cut the loaf in 18 slices, then wrapped each 6 pieces in plastic wrap.  I put the wrapped bread in freezer bags and froze them. This way I can take out a few pieces at a time and it will be fresher longer.

This bread turned out great.  It is buttery even without butter.  And with butter it is delightful.

Saturday, January 25, 2025

Iced Brownies

 Lee bought me the recipe book Sweet Tooth for Christmas.  I had checked it out from the library and found I wanted to make a BUNCH of the recipes. They had an iced or frosted brownie recipe called Lunch Lady Brownies.  I guess at one point a similar brownie was offered at school lunches.  I never bought a school lunch and my kids went to elementary schools that didn't offer a lunch so I wasn't sure what I would get. But who doesn't love a brownie?  These don't take much longer than a mix and were delicious. They turned out a bit more dense than the mixes. I did make a few minor changes to the recipe.

Iced Brownies

1/2 cup melted butter (1 stick)

1/3 cup cocoa powder

1 cup brown sugar

2 eggs

1 teaspoon vanilla

1 cup flour

1/2 teaspoon salt

Icing

2 Tablespoons butter, slightly melted

3 Tablespoons cocoa

1 cup powdered sugar

1-2 Tablespoons milk or cream. You may need a bit more if using cream

1 teaspoons vanilla

Preheat the oven to 350°.  Line an 8 inch square baking pan with parchment paper.

Whisk the melted butter with the cocoa until smooth.  

Add the brown sugar, eggs and vanilla. Whisk until incorporated. 

Switch to a spatula and mix in the flour and salt. Don't over mix.  Stop stirring as soon as you can't see the white flour.

Spread evenly into the prepared baking pan.  

Bake for 25-30 minutes. The top should look done and a tester should come out clean.

Cool on a rack.

While the brownies are cooling make the icing. Slightly melt the butter in a medium bowl in the microwave, about 15 seconds.

Mix in the cocoa powder, powdered sugar, 1 Tablespoon of milk or cream and the vanilla.  You may need to add a bit more milk if it is too thick.  If you do add some, do it a small amount at a time.

Pour or scrape out the frosting on to the slightly cool brownies and spread across the top.  Let cool.

Lift the brownies out by grabbing the sides of the parchment paper.  Cut into squares.  Store in an airtight container.

I had to cut one corner off to taste the brownies .  Just to make sure it was good.  It was!

After a day when we were able to have willpower and still had most of the brownies left, I individually wrapped several and froze them.  Now I have emergency brownies!

This recipe can be doubled and baked in a 13X9 baking pan. Bake at the same temperature and check for doneness at 25 minutes.

Friday, January 10, 2025

Italian Bread

 As I write, the town in which I grew up is burning to the ground. I grew up in Altadena, California.  It was an idyllic childhood.  Our yard was full of huge oaks and a tree house.  My father had planted many trees.  We had lemons, tangerines, oranges, figs, loquat and kumquat and many more.  We were free to pick fruit to eat and I pretended we were intrepid castaways.  The neighborhood was full of children of a similar age and we played sports in the alley and board games in each others houses. 

Our family had 5 kids.  The home we lived in was a small Craftsman/Victorian.  I remember sharing a room with my two sisters.  Then my father started adding on rooms and rebuilding the kitchen. When I was five I had to sweep the floors every hour.  This kept me busy so my father could work in safety.  

We would pack a sack lunch and head up Millard Canyon for a hike with no adults and a bunch of kids.  The rule was to be home before dark.  I rode horses in the street to trails up by JPL and the Rose Bowl.  This is not something kids can do today. 

I am so heartsick and just plain mad. I decided to take my energy out on making and kneading some bread. And crying.  

I have made a lot of bread lately and really enjoy the process.  Here is the Italian Bread recipe I used to make the bread for the next two weeks.  I usually freeze the second loaf.

Italian Bread

1 1/2 Tablespoons active dry yeast ( 2 packets)

1/2 cup warm water

1 Tablespoon sugar

2 cups hot water

3 Tablespoons sugar

1/4 cup Olive Oil

5-6 cups flour

1 egg, optional

It is very cold today.  It has been between 20° and 30°.  

This has made the bowl of my Kitchen Aid mixer cold. Yeast needs warmth to grow.  But heat will kill it, so there is a balance.  I  have been putting hot tap water in the metal bowl and setting it aside to warm up.

Set out the ingredients and then pour out the water in the mixing bowl.  Place the warm water and sugar in the mixing bowl, stir to dissolve and sprinkle the yeast on top.  Set aside for 5 minutes.

Place 5 cups flour in a large mixing bowl with the sugar and salt. Gently mix.  

The yeast should have puffed up and proved to be active. 

Add the olive oil and about 2 cups of the flour mixture and stir slowly with the paddle. 

Add the hot water 1 cup at a time alternating with a cup of flour.  After about 4 cups of flour with the paddle switch to the dough hook.  

Scrape down the sides and keep mixing and adding flour.  My dough took the extra cup of flour, so 6 of them. 

Sprinkle flour on the counter and place the dough on top. Mine was still sticky at this point, so I also added some flour on top of the dough ball and started kneading. 

 Knead until the dough is smooth and not sticky. I ended up using about 6 1/2 cups of flour altogether.

The flour bowl is now empty.  Put about 1 Tablespoon of olive oil in it and rub it up the sides.  Place the dough ball in the oiled bowl and flip it to cover it with a thin layer of oil.  

Cover with plastic wrap or a towel.  I use plastic wrap as I have had rising dough stick to the towel. Set the bowl in a warm spot and let rise for 1 hour.

By 1 hour the dough should have doubled in size.  Punch it down and turn it out onto the very clean counter.  

Divide it in half.  Press out the dough into a rectangle about 12X9.  

Fold it into thirds and pinch the seams.  

Repeat with the other half.

Fold into logs and place on a baking sheet lined with parchment paper or a silicone mat. I did both to see if they came out differently.  I didn't notice much of a difference, but the one on the silicone mat spread out a bit.

Preheat the oven to 375-400°. I used 375° because I had dark baking sheets.

Cover the dough for about 30 minutes.  It should rise up almost double. Make an egg wash. I used 1 egg and 2 Tablespoons of water in a small bowl. Whisk until combined. Make 3 shallow slashes across the tops of the loaves. Brush the tops with the egg wash.

Bake for 30 minutes. Switch the loaves around half way through to cook evenly. After 30 minutes, one loaf was brown and ready. I took it out and placed it on a cooling rack.  After about 5 more minutes the second loaf was also done.  Place on a cooling rack.

After cooling completely, I cut some slices.  The bread was soft and chewy.  Butter is always good on fresh, homemade bread.

The next morning I toasted the bread. I had one piece with butter and strawberry jam and one piece with Nutella.

All three methods were quite delightful. In fact, plain fresh bread with nothing on it was also perfection.